I couldn’t resist any longer: the recent exceptions added to the DMCA for jailbreaking allowed for the return of jailbreakme.com, the easiest way yet to jailbreak your iPhone. Just about every podcast I listen to/watch had talked about this and demoed it live so I figured what the heck? I made a full backup of my iPhone 3GS with iTunes and then fired up Safari …
software
TRENDnet internet cameras
Another piece of tech I implemented before we went on our vacation roadtrip was a series of TRENDnet wireless internet cameras so we could keep an eye on the house while we were away.
Acer Aspire Revo 3610
 My Dell OptiPlex Linux server was getting louder and hotter in its old age. For the past three years it has been running 24×7 as my media server in the closet. The fan in the power supply had started to whine (especially when the CPU was maxed), and I already lost one hard drive to a crash earlier in the year. I decided it was time to replace it and started looking for smaller, quieter, more power-efficient alternatives.
I call this box a server because it hosts this blog, a small Gallery site, some home media applications for my TiVos, and is running all the time, but I don’t need a server-class machine. My past Linux machines have traditionally been older desktops, even a laptop! So the latest crop of nettops seemed like an ideal solution.
After researching products like the Asus EeeBox, the MSI WindBox, and even the Dell Studio Hybrid I decided on the Acer Aspire Revo 3610. This little box packs in Intel’s dual-core Atom N330 CPU (1.60GHz), 2gb of RAM, nVidia’s ION graphics chipset, and a 160gb hard drive. Peripherals and storage can be connected via the 6 USB ports (one of which is used for the included wireless keyboard a mouse), the eSATA connector, and the SD card reader, and network connectivity includes a gigabit network connection and B/G/N wireless. The Revo has no optical drive, but experience with my EeePCs has made me comfortable with booting/installing from other removable media like USB thumb drives, so no biggie there. Also, since I’m not using the Revo as an HTPC I won’t be using the HDMI or digital audio (SPDIF) connections, but they’re there. The Revo comes with Windows 7 Home Premium pre-installed (although I wish Acer sold a cheaper version without it). If you’re going to use it as an HTPC it comes with a mounting plate so you can attach it right to the back of your HDTV.
My plan was always to put the latest version of Ubuntu on the box. Warranties be damned! After unpacking my new Revo, before even turning it on, I immediately cracked it open, thinking I would make an image backup of Windows 7 just in case (since it comes without a rescue disc). Unfortunately, even with my lack of fear for warranty-voiding, removing the hard drive involved more steps than I was willing to take. So rather than wiping the drive and starting clean, I booted Windows 7, did some initial setup, and then shrunk the primary partition so I could dual-boot Windows 7 and Ubuntu. Considering the current server only had a 30gb hard drive in it (and most of my media is on external NASes), having a 60gb partition for Ubuntu was acceptable to me.
Installing Lucid Lynx didn’t go as smoothly as I anticipated, however. The 64-bit version (imaged onto a 2gb USB stick) wouldn’t even boot correctly and the 32-bit version would start and then complain it couldn’t find the CD-ROM. After figuring out how to manually boot the installer from the command-line, I found this blog post that helped me get through the rest of my installation issues. Shortly, I had my Revo set up as a 64-bit Linux server!
It took me a few days to get everything transferred from the old server to the Revo and then get everything set up and configured the way I wanted. So far I am very impressed with the Revo. It’s very quiet, even when both cores are busy (i.e., folding a work unit and transcoding a video file), and my UPS utilization dropped from 29% to 10%! That’s a serious cut in power consumption. I have noticed a slight performance decrease over the old Pentium 4 Dell, but nothing major and it was expected. It’s well worth the trade-off for the reduced noise and power usage, though!
Out with the old, in with the new!
Leaping with the Lucid Lynx
Ubuntu 10.4 (Lucid Lynx) was released last week so over the weekend I completed three installs.
I did a clean install (from a USB thumb drive) onto my sandbox EeePC 4G Surf that was running an older build of Chrome. Ubuntu now calls this smaller build the UNE (netbook edition) instead of the UNR (netbook remix). It looks basically the same as before, except for the new purplish color scheme.
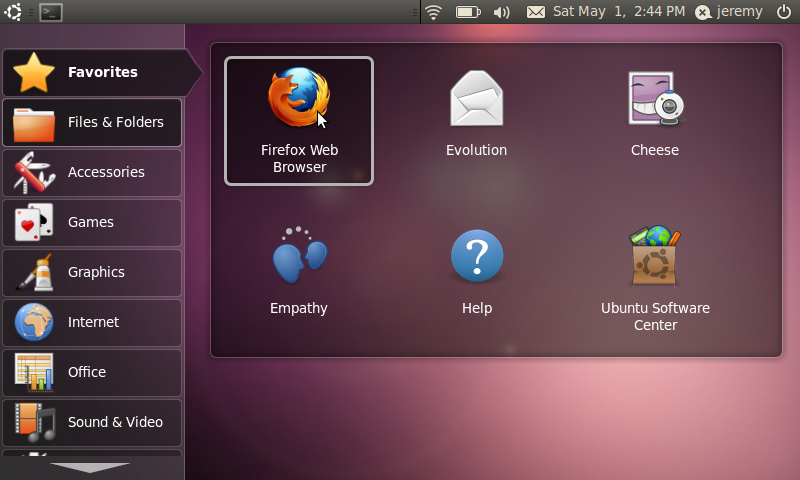
On my EeePC 900A, I did an in-place upgrade install via the Update Manager:
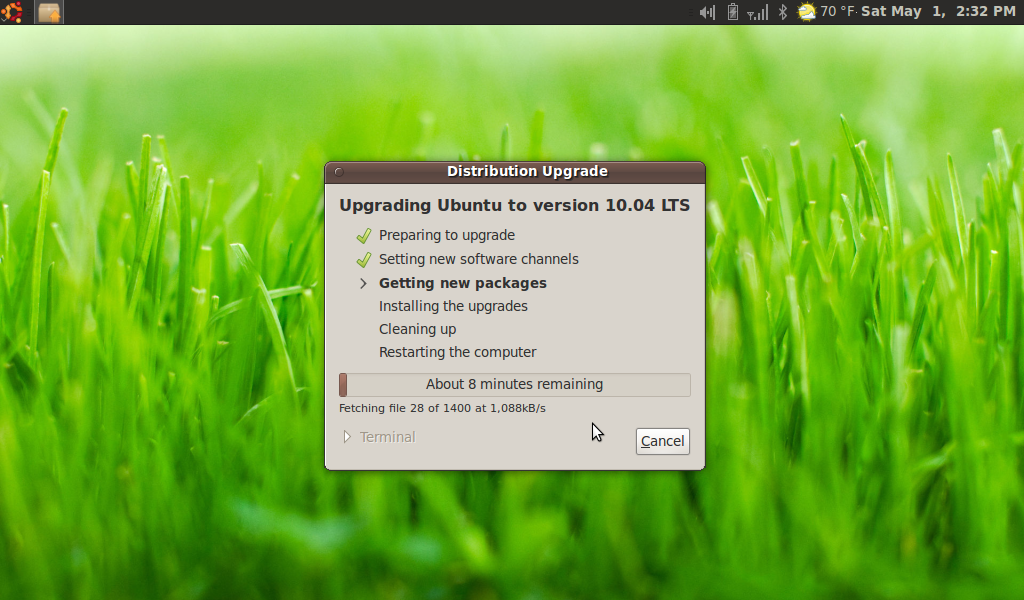
I had to free up about 200mb on the 900A in order to download the upgrade since the 4gb SSD in that netbook was too full, but once I did that, the rest of the upgrade was smooth and painless.
On my server, I did the normal command-line upgrade I’ve used for the past few releases. Having done this quite a few times now I have excellent notes (if I do say so myself) so it’s relatively easy to put back my customizations and settings where necessary. I did run into two post-upgrade problems, however. First, I was getting blank pages from Gallery and seeing segmentation faults in the Apache error log. I was able to work around this by switching from the ‘mysqli’ driver to the ‘mysqlt’ setting. Next, nut would no longer recognize my USB-connected UPS but I found this bug on Launchpad and was able to download a patch to get it working again.
More Wii homebrew: running games from a USB hard drive
I dabbled in Wii homebrew last year but didn’t do much beyond getting the Homebrew Channel working and messing around with a few apps. Then last week I saw this post on Lifehacker and thought, I have got to try this. The Lifehacker tutorial is pretty straightforward … the Wii hacking community has done some amazing work to make the soft modding process easy and (almost) risk-free. At least I haven’t bricked my own Wii, which is running the latest 4.2 firmware, yet.
I already had the HBC installed and working, but the first problem I encountered was during the DOP-Mii step. For some reason my Wii wasn’t able to download  the IOS updates/patches from NUS (Nintendo’s Update Servers), the same issue as described here (even though wireless connection was working). I wasn’t able to figure out how to get the required WADs onto my SD card for a local install, and trying to re-run the DOP-Mii step was now causing scary crash messages, so I gave up. I noticed that after attempting this, when my daughter went to play Wii Sports Resort, the Wii re-downloaded a system update, so luckily that seemed to reverse whatever the failed DOP-Mii patcher had done to the IOS.
A few days later I found another guide at WiiHacks.com and decided to give this another shot. This time I had the required WAD patches downloaded locally on my SD card so the DOP-Mii step worked as expected. But then I ran into a problem trying to install the cIOS. After some more Google searching I figured out I had to use the AnyTitle Deleter to clear out IOS249 before the new custom IOS would load properly (it’s possible that this was something left over from my last experiment with homebrew). After getting past all of that, though, I was able to complete the rest of the Lifehacker guide as documented.
For my initial testing, I used an old 40gb laptop hard drive I had laying around connected to a barebones USB adapter (pictured to the left) but I’ve since switched to a 320gb WD Elements drive split into two 160gb partitions (one WBFS, one exFAT).
Using the amazing USB Loader GX app, I backed up all of my games to the hard drive and then had it download the various box and CD cover art. It looks fantastic:
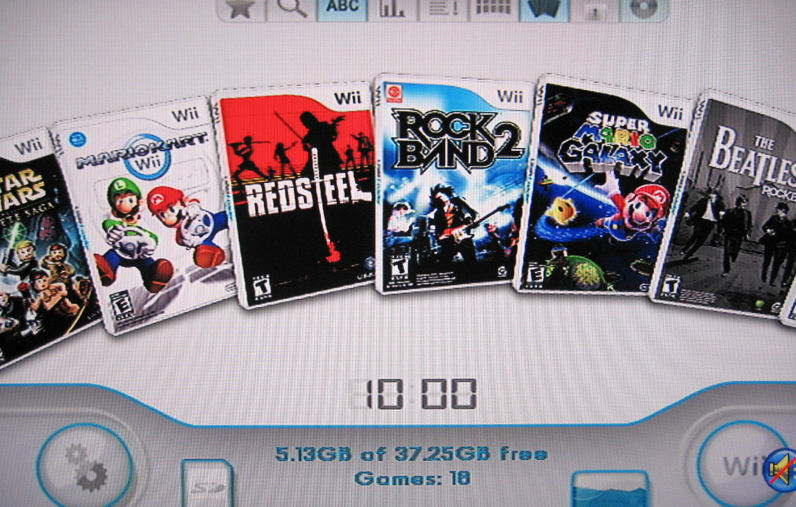
I tested running a few games from the hard drive and they worked just fine (even the online ones like Mario Kart). Sweet! Check out this little video I made to see it in action.
A helpful note: I kept having problems where the USB Loader would crash. It turned out that while moving the SD card back and forth between my PC and Wii, at some point the lock switch moved down slightly so the card was effectively read-only. Fixing the switch resolved the crashes. Just something to keep an eye out for!
Jungle Disk on the iPhone
Today Rackspace announced the availability of Jungle Disk for the iPhone. I can now finally access all of my files backed up on Amazon S3 while on the go, pretty cool!
Unlike the desktop version, however, the iPhone app is only for accessing files already on your S3 account. You can delete files from your Jungle Disk, but the only adding you can do is photos taken with the camera. I was hoping for a desktop-like feature that would let me backup my iPhone over-the-air to S3, but I guess I’ll have to continue to rely on iTunes for that.
Now I need to re-evaluate my use of some overlapping apps on my iPhone, namely Dropbox and Air Sharing. I like using Dropbox to easily sync files across multiple devices, so I’ll probably keep that around. Air Sharing, though, I might not need anymore. Since I stopped carrying my 2gb USB thumb drive loaded with portable apps and my documents, I’ve found I haven’t been using them via Air Sharing that much (if at all!). So rather than waste that storage space on my iPhone carrying around stuff I’ll never use, I’ll probably clear out Air Sharing and just use Jungle Disk exclusively.
It was time to upgrade
March 1 is quickly approaching and starting Monday, people who are still running the Release Candidate of Windows 7 will start seeing the expiration message. I’ve been running the RC at home since May of last year and knew this time would eventually come, so this past week I purchased the Home Premium upgrade media from Amazon along with some extra RAM for my Dell Inspiron 530 (it had two 512mb chips that I pulled and replaced with two new 1gb chips to bring it up to 4gb total).
Based on my previous experience with the Windows Easy Transfer utility, I used WET to backup my documents and settings to an external hard drive. To be doubly sure I didn’t lose anything, I also just copied my entire user profile folder (C:\Users\<my login>) to the same hard drive. I wanted to do a clean install with the upgrade media (and also go with the 64-bit version), so I made sure I had that external drive with my WET backup attached when I booted from the Win7 DVD. From within the Windows 7 Setup, I formatted my entire 640gb internal drive, completely wiping out the RC partition. Since Setup knew about the WET backup, the Win7 activation process was successful and the rest of the install was smooth.
After booting Windows 7 Home Professional 64-bit for the first time and then installing all the outstanding updates, the real fun began. I used WET to restore my files and settings and then began the long process of re-installing and re-configuring all of my applications (64-bit versions where applicable). I had made screenshots of the Programs and Features list before upgrading to facilitate this, so I knew exactly what I meeded to re-install. I had also taken screenshots of my Taskbar and Start Menu so I could put everything back the way I had it under the RC.
So I’m back up and running and have finally joined the world of 64-bit!
Two months with the iPhone
Steve Job’s recent announcement of the new iPad (really?) coincided closely with the two month anniversary of my getting an iPhone. So how have the past 8 weeks or so been?

I’m definitely better at typing on the virtual keyboard. I’m nowhere near as fast (or accurate) as I was on the Treo’s physical keyboard, but I can see a definite improvement over three months ago. Hopefully I’ll continue to get better as I learn more tricks. I’ve also adjusted to life without the clickwheel for basic iPod functions, which still accounts for the majority of my iPhone usage. The audio scrubber is frustratingly inaccurate, however, and I find it diffiicult to use. The voice commands come in handy while driving in the car so I’m finding myself using those more often. At home, we’ve got the Griffin PowerDock dual-charging station so we can keep my and my wife’s iPhones charged without having to pull out the little white charger blocks.
I originally complained about it not being easy to sync the iPhone with multiple PCs, mainly because that made it harder to download content while travelling with my laptop (my primary iTunes machine is my desktop at home). I found that you can download new podcasts directly from the device, which is cool … unless you happen to be using AT&T’s 3G data service instead of WiFi (see the screenshot to the left). No downloading new podcasts while driving in the car. 🙁 To make it easier to sync files (or photos), I’m using DropBox on my PCs and the iPhone. I just move the photos from my camera roll into the DropBox folder using the app and it’s automatically synchronized to all of my other devices running the DropBox client.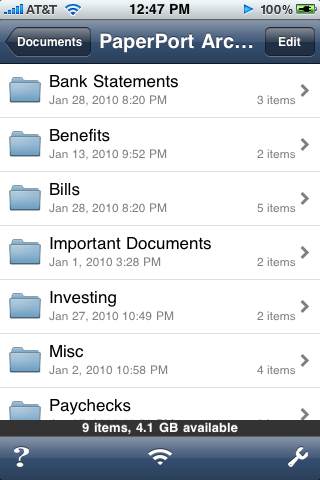
I used to carry a 2gb USB thumb drive around that contained my portable apps and personal documents, but why continue to do that when I’ve got extra room on my 32gb iPhone? I purchased Avatron’s Air Sharing application (screenshot to the right) which for $3 turns your iPhone into a wireless storage device. I can map my iPhone as a drive on my Windows PC (or connect via the browser) and then use my regular synchronization software to copy files back and forth. Yes, DropBox can do the same basic thing, for free, but I’m not comfortable storing some of my personal documents on DropBox’s servers so Air Sharing lets me eliminate that middleman (besides, I’ve got this stuff backed up to my encrypted Amazon S3 account through Jungledisk, no need to duplicate them out in the cloud again). Air Sharing also supports viewing most document types like Word and Excel, PDF, etc.
If you live in a multi-iPhone household and need to keep a synchronized shopping list, you must purchase GroceryIQ. For just $1 you get a full-featured list app that supports multiple stores, aisle and category customization, barcode scanning, and list sharing. If I purchase something on the list and mark it off, it will disappear from the app on my wife’s iPhone so we don’t end up both buying the item. By customizing the aisle order for each store, our grocery shopping is more efficient: no more back-and-forth in the store because we forgot an item that was two aisles back. Everything is listed in the order you go through the store. I was a little disappointed that the recent version includes little ads in your shopping list, but they’re not that intrusive and heck, it was only $1 and that’s well worth the features you get.
i.tv is neat little app (free) that turns your iPhone into a connected TV guide. You can search TV listings for your lineup, see what’s currently on and what other people are watching. What I like, though, are the TiVo features (of course!). After linking your tivo.com account you can schedule upcoming recordings directly from your iPhone. There’s also a feature that turns your iPhone into a WiFi-enabled remove control for your TiVo (Series3 models only). Yes, I can change the channel on my TiVo in the family room from across the house (except you can’t control TV functions like volume, so I still need the remote extender for that). Fun to play with.
Other than those additions (plus a few free games), I seem to be past the initial “must-download-and-try-everything!” stage of installing apps. My list seems to have stabilized around 5 pages of icons, which I try to have organized by type: most-used, utilities, games, work-related, misc., etc. Unfortunately the lack of real customization features on the springboard makes it hard to really categorize the icons so I’m trying to learn to live with that. 🙂 It’ll also be interesting to see which (if any) new features introduced in iPhone OS 3.2 (running on the iPad) make it into the iPhone itself in the next few months.
Recovered from The Crash
After a few evenings’ work, I’ve recovered from The Crash and have my server back up and running!
The problem started last week on Thursday when I found the server was not responding to pings, none of the services were available, and the fans were cranking at 100%. The server is headless, so I hooked up a monitor to see if anything strange was going on. Unfortunately, there was no video signal … and even the “raising elephants” magic key sequence didn’t do anything. My only option was to hard power off the box and restart it, at which point it seemed back to normal except none of the system logs showed anything that would indicate what the problem was. A similar thing had also occured back in December while we were up in Cleveland which I had just written off as a random crash, but now this was the second time. I should have known better that Linux just doesn’t crash 😉 and sure enough, the box was locked up again Friday morning.
That evening, I pulled the server out of the closet and hooked it up at my desk along with monitor and keyboard so I could interact with it directly instead of over an SSH connection. I figured maybe this way I could see if anything strange was happening that wasn’t being reflected in the logs. It all seemed normal until finally I saw this:
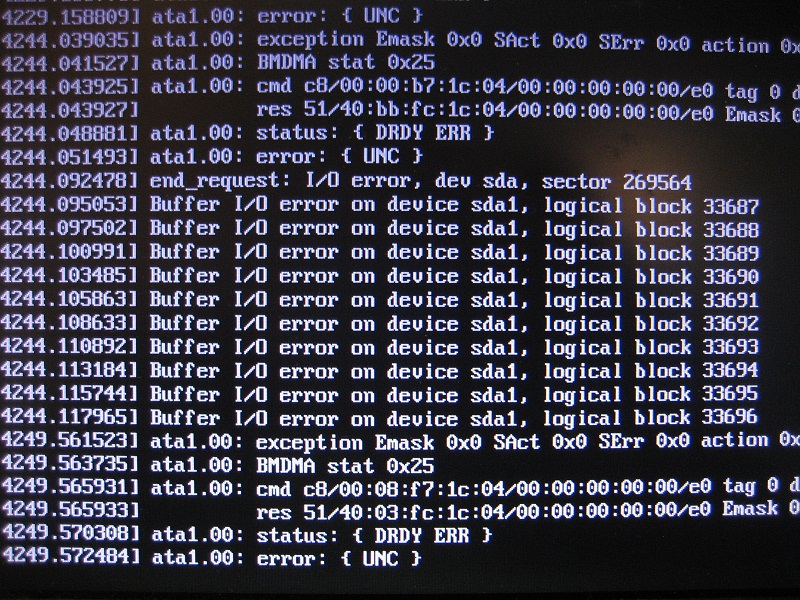
Oh oh … that couldn’t be good. ata1.00 was obviously referring to the hard drive. A quick search on that { UNC } code showed “Uncorrectable error – often due to bad sectors on the disk” so it became apparent that the drive was failing. Presumably there was some bad area of the disk and when the server accessed that area it just locked up. At this point I tried running a disk check and started getting all sorts of I/O errors. Rather than push the drive to complete failure with the scan, I decided to rebuild the server on a spare drive and restore from backup.
The failing drive was an old 120gb and all I had around were older IDE 20gb, 30gb, and 40gb drives (no SATA controller in my “server”). I wasn’t using all 120gb, so moving to a smaller drive was an acceptable solution. My first thought was to make an image of the failing drive using EASEUS Todo Backup which works great for imaging Windows PCs even when moving to smaller drives. Unfortunately the software doesn’t recognize the Linux file system so it could only do a sector-by-sector copy, which means I could only copy the image to another identical 120gb drive. With the image copy option off the table, I decided to just do a clean install of Karmic on the spare 30gb drive and then restore what I could from my backups. I hadn’t done a clean install of Linux since I put this server together back in 2007, so why not? I spent the rest of weekend re-installing and re-configuring packages to put the server back the way I had it. Luckily I keep good notes of all the changes I make, so between that, being able to pull files (like the MySQL databases and configuration files) from the 120gb drive connected via a USB enclosure, and having the rest of the important stuff backed up on my two NAS devices and in the cloud (via Jungledisk), the restore process was relatively straightforward with no data lost.
Sunday night, I moved the rebuilt server back to its home in the closet. After a quick check to make sure everything was running, I went to bed. The next morning, I heard a loud fan noise coming out of the closet … the server had crashed again! 😮 Same symptoms, not good. I had to get to work so I just shut the server down and left. Monday evening, I started it up again and logged in via SSH (remember, it’s headless when it’s in the closet). As before, there was nothing in the logs to indicate a cause of the crash. The difference now, though, was that the system seemed to be crashing faster. After just a few minutes, it would be locked up like before the disk crash. So I pulled it out of the closet again and hooked it up to a keyboard and monitor so I could watch it crash first-hand … and it didn’t crash.
Google to the rescue! I found this post that seemed to describe my exact problem: a headless server running the latest 2.6.31.x kernel crashed after just 10 minutes. The cause? The screensaver! Or, rather, since the server isn’t running X windows, the screen blanker that turns off the monitor after 10 minutes. Apparently due to some bug in the interaction between the kernel and the basic video driver, when the system tried to turn off the monitor when no monitor was attached, the system would just hang. This is why the system was just fine as I worked on it all weekend, but then crashed as soon as I moved it back into the closet and it was headless again. I added the suggested init script for disabling the screen blanking to my system, rebooted, and waited. 11 minutes later, the server was still running. Eureka!
The server has now been stable for a few days, so I finally seem to be past the problems. What bugs me now is the similarity of the two crashes. Obviously, according to my diagnostic tools, the original hard drive was failing in a bad way. Is it just a coincidence that the second video/screen blanking-related crash exhibited the same symptoms as the failing disk? That seems suspicious, but the server was running for a lot longer in between crashes, not failing after just 10 minutes of uptime. I was using a slightly different version of the 2.6.31 kernel on the old drive (I’m using 2.6.32 now) so maybe it was due to that different revision.
At any rate, after all of that, the server is finally back. In addition to giving me the “opportunity” to rebuild the server from scratch, this incident also helped to confirm that I’ve got a decent backup strategy in place. Sure, it took me a few days (instead of hours) to get everything back online, which wouldn’t be acceptable in a business situation, but at least I had zero data loss!