 Hey, just so you know ... this post is now about 9 years and 2 months old. Please keep that in mind as it very well may contain broken links and/or outdated information.
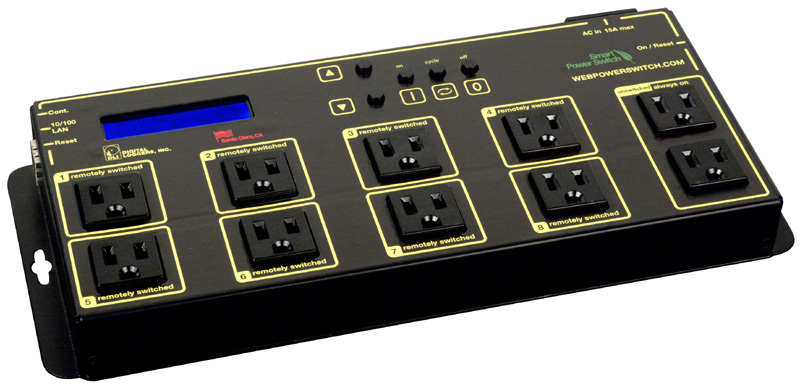
Over Christmas vacation I had a network outage that left me without remote access to my home network for a week. While I was at my in-laws, unable to connect to my server or cameras, I started researching options for out-of-band management of my home network. I started with cellular devices like this, but they all seemed to be GSM (2G) and most carriers are shutting down those older networks. I decided instead to go with a “smart” power strip, the Web Power Switch 7, which can power cycle devices plugged into it based on network connectivity criteria.
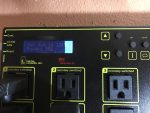
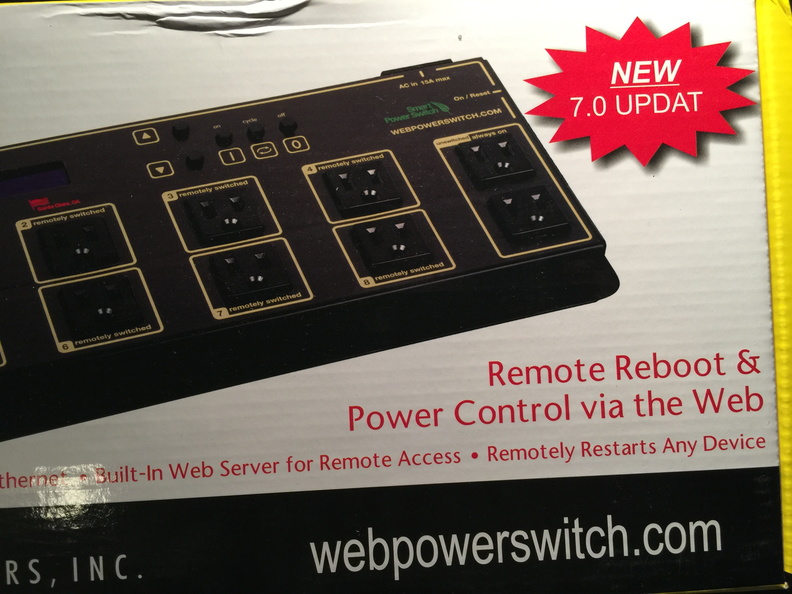
The Web Power Switch 7 from Digital Loggers is a solidly constructed (i.e., metal casing) 10-outlet (15A) power-strip/surge suppressor with a built-in 2-line, 16 character LCD screen, navigation/control buttons, and network interface. The initial setup is pretty straightforward, except for the fact that the LPC7 doesn’t support DHCP so you need to either use the keypad and screen or jump through a few networking hoops with the device connected to your PC in order to set the initial IP address. Once it’s on the network, though, you can configure the rest of the options via the web interface, similar to managing a consumer router.
Eight of the ten outlets are controllable via the web interface (or scripting, more on that later). The other two are “always on.” Through the web interface you can label the outlets so you can remember which device you are controlling. Power options are On, Off, and Cycle (which will turn the outlet off, wait a specified time period, and then turn it back on) which you can control by individual outlet or all of them at once. For a more advanced (i.e., office or data center) installation, you can even create multiple user accounts and assign outlet permissions (so a server admin could power cycle their own servers on outlets #1 and #5, but not be able to affect the other outlets).
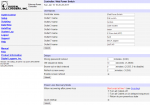
While being able to interactively power cycle the outlets is nice, the real power in the LPC7 is its ability to control the outlets automatically. AutoPing is DLI’s name for the feature where you can specify IP addresses for the power strip to monitor and, if it doesn’t receive a ping response for a specified time period, power cycle specific outlets. For example, you could ping a site out on the internet (say, Google DNS at 8.8.8.8) and if there was no response for 10 minutes, the LPC7 could reboot your cable modem. Scripting is another available feature. Using a syntax very similar to BASIC, you can run scripts on the LPC7 to change the display, control outlets on a schedule, send syslog events, etc. You can use scripting in conjunction with AutoPing for more fine-grained control of your outlets when a network outage is detected too.
It’s a great device, but it’s not perfect. I’ve run into quite a few flaws. None of these are major, but they’re annoyances:
- outlet spacing; the manual indicates “outlets are spaced for large adapters and plugs” but this is not really the case. All of the outlets face the same way so depending on which way your power bricks plug in you probably won’t be able to have two right above (or even to the side) of each other. I had to use 6″ extension cords in order to allow space for all of the bricks.
- no DHCP; as I already mentioned, this makes out-of-the-box setup a little harder, but it’s not a deal breaker. DLI support told me a newer model is coming that will have DHCP built-in.
- there’s no way to export/backup the configuration from the web interface; there’s a reset button on the side to restore all of the factory defaults in an emergency (if you wrote a buggy script, for example), but you’ll have to manually set up everything again … including all your scripts!! This seems like a big oversight for a configurable piece of equipment.
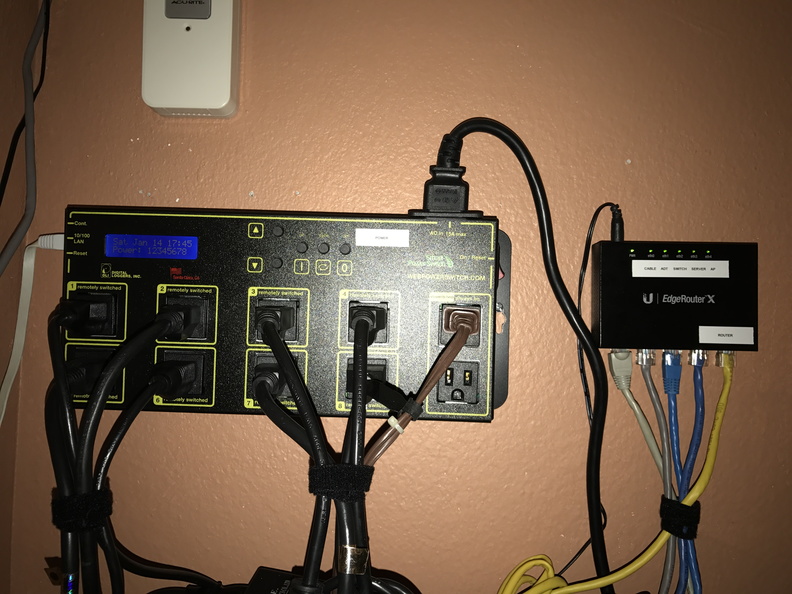
- the LCD display backlight is always on; it has two settings (bright, and not-as-bright) and for scripting you can control how long the bright delay lasts, but even the not-as-bright setting can be pretty bright in a dark room. When I asked DLI support about this, their answer was: “The only options are to change the contrast, or simpler yet, use something like electrical tape to cover it.” Covering the display with tape kinda defeats the purpose of having a status display so I bought a pack of Light Dims and used them to dim the display even more (check out the photo gallery at the end of this post for an example).
- the LCD display doesn’t auto-refresh, unless you do so via scripting; by default, after the LPC7 boots it shows the date and outlet status. The date on this screen never actually updates though. And if you interact with the keypad, the screen won’t default back to the date/time/status display, it stays where you left it. I confirmed with DLI support that you have to use scripting if you want to have an updated, default display (see my script samples below).
- on boot, the outlets power on in numerical order; keep this in mind when connecting your equipment if you want to keep things simple: cable modem on outlet #1, router on outlet #2, etc. If, like me, you connect your equipment to “random” outlets but have a specific power-on order, you’ll have to do it via scripting.
- writing scripts is difficult; the script syntax itself isn’t difficult, but having to put in one line at a time (pressing Enter after each one so the web interfaces saves that single line and refreshes) can make programming a tedious task. It’s also a little confusing (see the next section for a breakdown on this).
- AutoPing can control an outlet, or run a script, but not both; so if you want to power cycle an outlet and send a syslog event, you’ll have to do both the power cycle and log event in a script.
- AutoPing doesn’t automatically start on boot? This one is still confusing to me and my e-mail to DLI support didn’t help. A lot of their documentation seems to indicate you need to write a script to start up AutoPings when the LPC7 starts, even if you have AutoPing configured in the web interface. This seems unnecessary and confusing, but I went with the belt-and-suspenders approach and wrote a script to start my AutoPings (and restart them every 24 hours) just in case.
- almost every page on the DLI web site has a YouTube video that auto-plays! I just had to through this in there because it’s super annoying that everytime I go to the LPC homepage that video starts playing right away (or background music/narration here). Arrgh, don’t do that! Just click on that link to see what I mean.
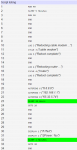
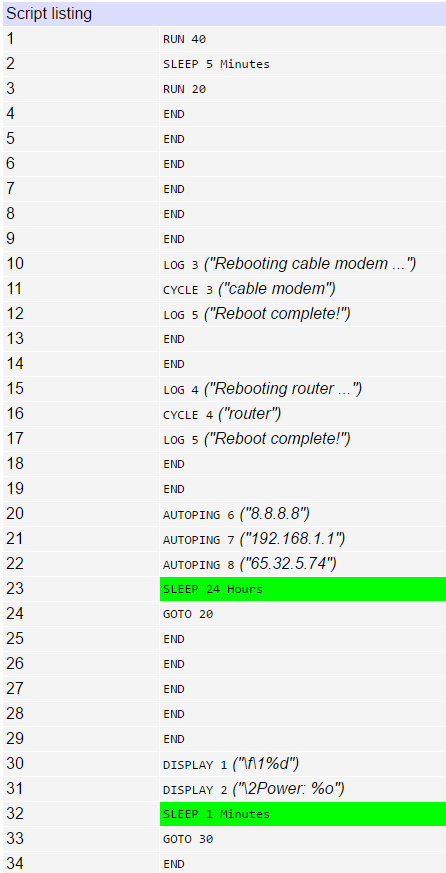
And now for a bit on scripting. There are 127 available lines for scripting. You can put your scripts anywhere in those 127 lines and then refer to/run them by line number. Anything on line 1 is run when the LPC7 powers up so DLI support recommends putting calls there to your other scripts. In my case, for example, my startup script looks like this:
1 RUN 40
2 SLEEP 5 Minutes
3 RUN 20
4 END
Line 40 contains my custom outlet order boot script, so the LPC7 will kick that off in a separate thread and then wait for 5 minutes before starting my AutoPing script at line 20 (see the screenshot below). At the end of my outlet script, another script is run at line 30 which is an infinite loop to keep the LCD screen current:
30 DISPLAY 1
31 DISPLAY 2
32 SLEEP 1 Minutes
33 GOTO 30
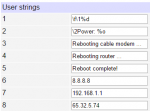
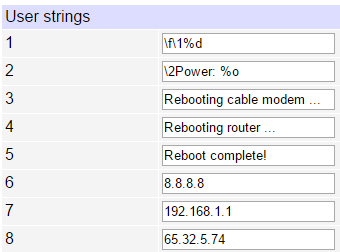
In order to display (or log) text, you have to define user strings and then refer to the string number in the code (there are also handful of system variables you can use in your user strings). In the script above, for example, line 30 displays user string #1 and line 31 displays user string #2. The script then sleeps for 60 seconds and starts over. User strings #1 and #2 look like this:
\f\1%d
\2Power: %o
They clear the LCD (\f) and then show the date/time (%d) on line 1 (\1) and the word “Power:” followed by the outlet status (%o) on line 2 (\2).
So the basic principals and syntax aren’t difficult, but actually writing the scripts in the web interface is tedious. It’s not like you’re using a regular text editor, you have to enter one line at a time, in a specific field, then press Enter to save the line before moving on. And since there are 127 pre-defined fields, if you forget a statement in the middle of a script, you have to manually re-enter the script, one line at a time, to shift everything down to make room for the missing statement. Ugh. This area of the web interface can definitely use some improvement especially because this is where all the power of the LPC7 is utilized. At least the user-strings (and outlet names) appear next to the corresponding statements so can you tell if you’re referring to the proper location.
Now that I’ve got everything in the computer closet connected to the Web Power Switch 7 I’ll have to wait and see if my setup helps avoid home network outages! I’ll be sure to let you know how it goes.
-
- Web Power Strip 7
-
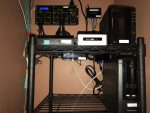
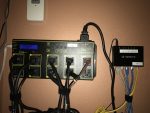
- computer closet re-org

-
- LED dim sticker on display

-
- LPC7 web interface

-

- AutoPing setup
-
- user-defined strings
-
- scripting
-
- 7.0 Updat? All right!
I bought a second LPC7 for my home theater cabinet. Now, with scripting, I can reboot the tuning adapter attached to my TiVo on a weekly schedule.
I’ve also acquired the new Web Power Switch Pro (LPC9). It adds a lot of the things I felt were missing from the LPC7: wireless connectivity, DHCP (yeah!), e-mail notifications, a new scripting language (Lua), backup/restore of the config, and a ton of other advanced features (even Alexa support!).