 Hey, just so you know ... this post is now about 2 years and 1 month old. Please keep that in mind as it very well may contain broken links and/or outdated information.
For Part 3 of my latest round of upgrades to kick off 2024, I also made some hardware changes to my Ender 3 Pro 3D printer for the first time since getting it back in 2021:
- installed a new mainboard
- installed the CR Touch automatic bed levelling sensor
- installed a new metal extruder assembly
- replaced the bowden tube, nozzle, and bed springs
- upgraded the firmware to the latest build of Marlin (next post!)
Yeah, just a few things. 🙂 I completed these changes around the same time as the upgrades to my HomeTroller and Debian Bullseye, but wanted to wait a bit before posting so I had more time to play around with the results and I’m pretty pleased!
Mainboard
The first (and biggest) change was replacing the existing Creality 8-bit (v1.1.4) mainboard that came installed in my printer with a new Creality 32-bit (v4.2.7) one. This involved removing a few screws to open the case housing on the left side of the printer, removing the board, transferring the various cables and wires to the new board, and then re-installing it into the housing. It wasn’t difficult but I went slow and took my time (even watched some YouTube videos like this one as I went along to be aware of common pitfalls) to make sure everything went smoothly. Luckily most of the cables are pre-labelled with little plastic yellow tabs, but I did have to snip off some hot glue blobs used to secure them in the plugs and also with my big hands it was a challenge to get these tiny little plugs in the right location when other cables were blocking the way. But I managed to get it all done:

swapping out the mainboard
Before buttoning everything up, I did a quick power-up test to confirm the printer would boot. It did (yay!) but the firmware defaulted to Chinese so I had to do a quick Google search to figure out which menu item to navigate into to switch it to English. After that, I was able to confirm the new v4.2.7 hardware along with the v2.0.8.2 version of the Creality/Marlin firmware.
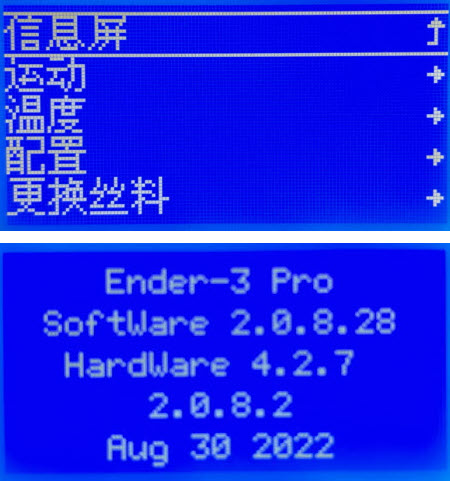
Chinese menus and the new v4.2.7 hardware board
Another thing I didn’t realize ahead of time was that the USB port changed from mini-USB on the old board to micro-USB on the new one, so I had to find a new cable for the connection back to the OctoPi.
This latest hardware is also referred to as the “silent” board and wow I did not expect how big a difference that would make. The printer used to “sing” as the various motors would move the head along the X/Y/Z axes but now literally the only noise is the fans from the hotend and power supply. I used to be able to tell a print was going from the other room based on the “tune” of the motors but now printing with the Ender 3 Pro is indeed “silent.”
The other reason I wanted to upgrade the board was for automatic bed levelling, so …
CR Touch
While I had the mainboard exposed, I also installed an automatic bed levelling sensor. The CR Touch is Creality’s version of the BL Touch. It’s basically a small device that attaches to the side of the hotend and extends a small metal probe below the nozzle to determine the height of the bed. Installation involved pluging one end of the 5-wire cable into the dedicated port on the new mainboard, fishing the wires through the conduit up to the hotend, then attaching the CR Touch hardware with the provided bracket.

CR Touch port on new mainboard

CR Touch installed
Since the probe will be used as the Z-axis endstop (telling the printer when to stop moving down the Z-axis), I also had to unplug the existing Z-axis endstop sensor from the mainboard and remove it completely. Now, instead of using the old manual paper method (move the nozzle to the four corners and center, adjust the levelling wheels/springs until you can just barely slide a piece of paper under it), a new “Level Bed” menu option has the CR Touch move in a 4×4 grid (16 touchpoints) and determine the height of the bed at each location (you still need to set the Z-offset manually with the paper method, but that’s a lot easier than needing to level the whole bed).
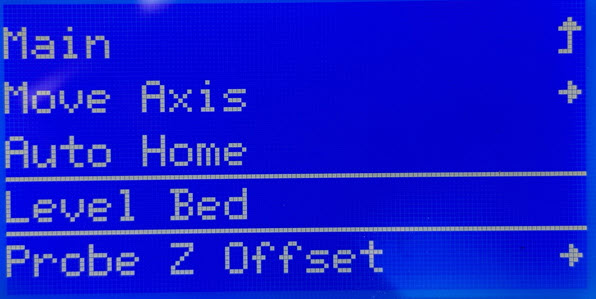
“Level Bed” menu option
The ABL info is stored in a “mesh” that the printer can use during a print to finely adjust the height of the Z-axis to account for differences in the height of the bed at different coordinates in the mesh. The end result is (should be) a nice perfect first few layers without all the manual fiddling. Here’s a quick video of the ABL in action on my Ender 3 Pro:
; perform auto-bed leveling before print
M140 S60                      ; pre-heat the bed
M104 S170                     ; pre-heat the hotend (just below melt point)
M117 Auto-bed leveling ...    ; show ABL message
G28                           ; home all axes
G29                           ; perform auto bed level (w/CR Touch)
Yes, this adds some delay before printing starts but it’s worth a few extra minutes at the beginning of a long print to ensure good first layer adhesion. I even added the Bed Level Visualizer plugin to OctoPrint that can graphically show your ABL mesh and make suggestions on how far (and which direction) to turn the levelling wheels. Here’re my before and after screenshots after “dialing in” my bed. That “spike” in the front-right corner seems to indicate a “warped” bed but I was able to kinda smooth it out:
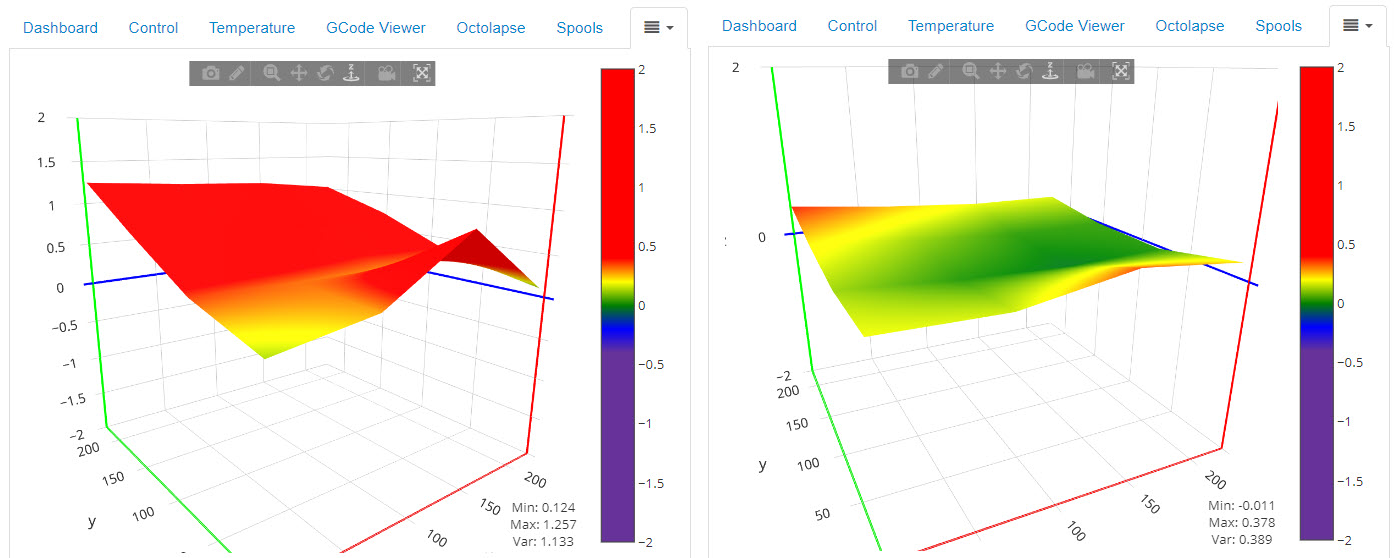
Bed Level Visualizer in OctoPrint (before/after)
I can’t believe I waited this long to go with ABL … since installing the CR Touch I haven’t had a single first-layer issue. It’s awesome.
Metal Extruder
The parts kit I ordered (see below) included a new all-metal extruder assembly to replace the stock plastic one. So while there was nothing wrong with the plastic extruder, I went ahead and replaced it while I was doing all the other hardware work. The new extruder didn’t have great instructions, but again YouTube to the rescue: I found a great video with the step-by-step to walk me through removing the old plastic pieces and replacing them with the new metal ones.
Since replacing the extruder I’ve noticed it’s a lot easier to thread in the filament. Not sure if this is because everything is shiny and new or the pieces are just better aligned, but I definitely don’t struggle as much trying to get the filament through the motor gears into the bowden tube (see the next section for a photo).
And speaking of the bowden tube …
Other Hardware
I found this accessories upgrade kit for the Ender 3 Pro and included it as part of my hardware refresh project. It came with the metal extruder assembly (see above), Capricorn PTFE bowden tubing, and new bed springs. Since I had to take the extruder apart to replace it with the metal one, I already had removed the bowden tube assembly from that side. Getting it out of the hotend was a little more difficult though, I had to actually warm it up to remove it. Ugh, what a mess … guess it was definitely time for a replacement!

melted bowden tubing
I cut the new tubing to length, installed it into the extruder and hotend with new compression fittings and clips, and then clipped it to the existing fabric wiring conduit (I had printed those orange clips a while back).

new bowden tube (and metal extruder)
While I was working on the hotend, I also replaced the nozzle. I have a ton of replacement nozzles of different sizes so I’m not sure why I hadn’t done this before (YouTube was a great help here again). Once I removed the old nozzle and saw its condition … yeah, I definitely need to do this more often.

new and old nozzles
With the new 0.4mm brass nozzle (and new silicon sleeve) installed, that left just the bed springs.
Replacing the springs was a little more involved, but still nothing crazy. After watching the requsite YouTube videos (like this one), I removed the levelling dials and (carefully) the heated bed which allowed me to replace the stock silver springs with the new yellow ones from the kit. Now that I’ve got the CR Touch installed for automatic bed levelling, replacing the springs (which supposedly give better “hold” to keep the bed levelled where you set it) was probably not necessary, but they came with the kit and I was already taking everything else apart so why not learn how to do this as well?

removing the heated bed

installing new springs
Final Result
I love tinkering and doing all of this on my Ender 3 Pro was a fun day well spent. Once I had everything buttoned up and working again it was time to do some printing! I had to dive into learning some more about automatic bed levelling (like Cura and Octoprint settings, the software side of things) but then executed some successful prints!

a nice level bed print test
It seems a lot less stressful now, not having to worry if that first level is going to down right. One of the parts I printed was a different bracket for the filament spool, moving it from up on top of the printer down to the left side for a more “direct” filament path. I also added a new bed handle and camera bracket (for better timelapses) and new knobs for the extruder and Z-axis.

Ender 3 Pro setup
Now that the hardware upgrades are done … on to the firmware upgrade!