 Hey, just so you know ... this post is now about 5 years old. Please keep that in mind as it very well may contain broken links and/or outdated information.
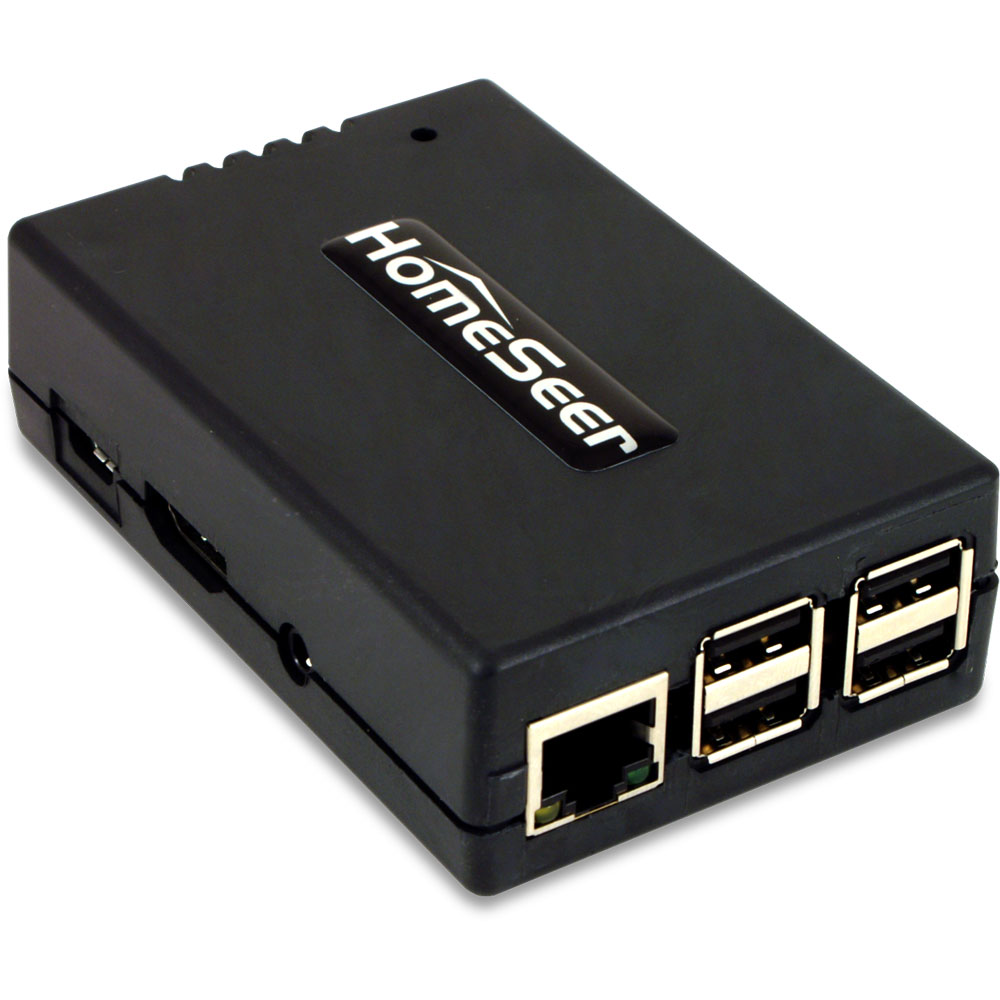 2021 Home Security/Home Automation Re-Design [ Part 2 of 3 ]
As I posted a few weeks ago, back in January I decided to cancel my ADT Pulse service and replace it with a Ring Alarm security system. It wasn’t a 100% feature-complete replacement though, I still needed something to handle the home automation side of things. While Ring does have some basic integrations with its lights and cameras, I decided that splitting the security and automation systems apart was the smarter and more flexible approach.
After researching (via online reviews and the community forums) solutions like SmartThings, Hubitat, HomeSeer, Alexa (which turned out to be Zigbee-only), and even briefly considering revisiting Home Assistant, I went ahead and pulled the trigger on a HomeSeer HomeTroller Pi hub. I waffled a lot between the Hubitat and HomeSeer, but decided to start with HomeSeer since it seemed to have more broad compatibility with my existing devices (specifically my garage door opener, door locks and light switches).
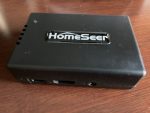
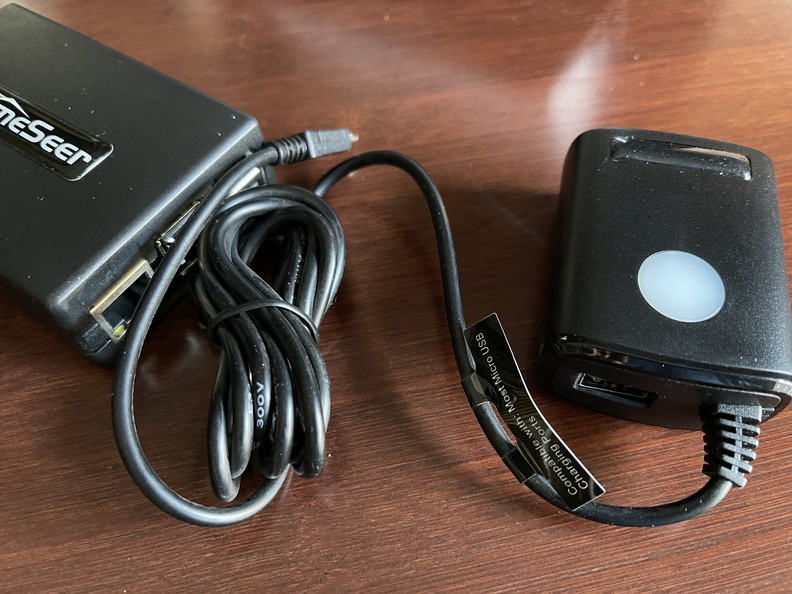
HomeSeer sells smart home hubs (called HomeTrollers) which are basically a Windows 10 PC or Raspberry Pi running their HS4 software (you can also purchase the software separately and run it on your own hardware if you prefer). Oddly, the more expensive Windows-based HomeTrollers don’t include any Z-Wave hardware (you need a separate Z-NET device), yet the cheaper RasPi-based version has Z-Wave Plus included. I opted for the Pi-based HomeTroller which, despite being based on older Pi 3 hardware (1.2GHz quad-core CPU, 1gb of RAM, and 16gb SD card) and only supporting a max of five plug-ins, seemed to be a good entry-level way to determine if HomeSeer would meet my needs (spoiler alert: it does, and yes, this means I now have 5 Raspberry Pis in the house (4 actively in use)).
Setup
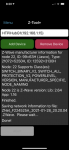
Even though the HomeTroller Pi is built on a Raspberry Pi 3, it’s meant to be treated as an appliance. The plastic case is sealed and while you can access the ethernet, USB, HDMI, audio, and power jacks, the SD card slot is inaccessible. The quick setup involves using the included ethernet cable to connect the HomeTroller to your network, then powering it up (AC adapter also included). Once the LED is green (indicating everything is booted up), you point your browser to find.homeseer.com which redirects to the HomeTroller’s local IP address and allows you to log into the web UI, activate the HS4 license, and then change the system password. It also walks you through creating a MyHS login, which is HomeSeer’s cloud service allowing remote access (for the mobile app and integration with other online services like Alexa and IFTTT). Now that you’re in HS4, it’s time to start adding devices.
-
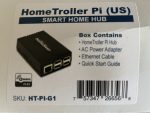
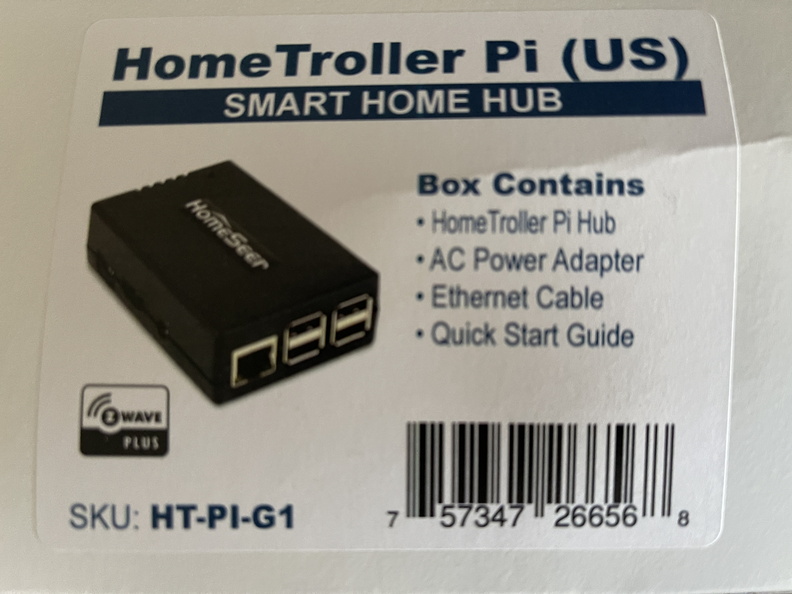
- box
-
- HomeTroller Pi

-

- power supply
Pairing
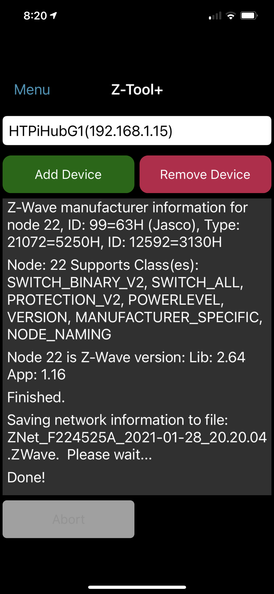
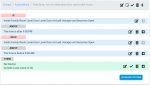
During my initial proof-of-concept, I removed a few Z-Wave devices (an outlet, light switch, and door lock) from ADT Pulse so I could pair them with the HomeTroller. Pairing a Z-Wave device is easy: put the controller into pairing mode (through the HS GUI), press a button on the device itself to initiate the pairing, and wait for the magic to complete. The new device (and a lot of its internal settings and functions) appear in HS4. You can also use the Z-Tool+ mobile inclusion app (which is what I did). Once I had the outlet paired, I could click the virtual power switch in my web browser to turn it on and off. HomeSeer detects the device type, so it knows a switch from a dimmer and displays the appropriate options (see the screenshot below). Pretty straightforward, especially if you’re coming from another home automation system like I was from Pulse.
Like back in the day when I was originally adding all my Z-Wave devices to Pulse, I had range issues. Recall that Z-Wave is a mesh network, so devices can connect to the network either by talking directly to the controller, or to other nearby devices. During my early Pulse setup, I had to use an inclusion controller (a special Z-Wave remote control) in order to pair devices that were too far from the hub. Once they were part of the mesh, the distance to the hub no longer mattered because they could talk to other nearby devices instead. ADT dropped support for inclusion controllers at some point and back in 2018 when I had their hub replaced, I had to use a long ethernet cable in order to temporarily move the hub closer to those further devices so I could pair them again. So of course, I had the same problem with the HomeTroller when it came to the door lock … it was just too far away to complete the pairing process (and as I learned during my Ring installation, battery-powered Z-Wave devices do not act as repeaters in the mesh, hence the need for a powered range extender). Luckily the HomeTroller is small and easy to move around, as long as you have a long enough ethernet cable or the other benefit of it being a Raspberry Pi is that you can connect it to your WiFi instead and then all you need is a power outlet nearby. Once the lock was paired, I moved the HomeTroller back to its customary location in the computer closet and it was still able to control the lock. I read somewhere (and I can’t find it now) that apparently the Z-Wave signal for initially pairing a device is not as strong as the signal for normal communications (probably a security precaution to prevent unexpected remote pairings?).
I was immediately impressed with the complexity of HomeSeer’s interface. I know that’s an odd thing to say, but coming from a closed-down system like Pulse, when I saw my door lock device showing not just the status of the lock, but the status of the battery, and other info, I knew this was going to be a cool replacement. HomeSeer can expose all of the Z-Wave configuration options for a device. Yeah, it can get a little overwhelming at first, but once you get used to it (and hide the stuff you don’t need to see), it’s pretty powerful. For example, Z-Wave devices can be programmed via parameters: on my light switches you can configure whether the little blue power LED is on when the switch is off (default) or when it’s on (which is what I prefer); on my dimmer switches you can control the speed of the dimming; and for most devices you can control how they respond to an All On/All Off command. With Pulse, I had to use the inclusion remote for this kind of programming … it was clunky, but it worked. In HomeSeer, you can access and set all of those parameters right from the advanced settings in the UI. Sweet! Just three devices paired and I was already prepared to leave Pulse behind and never look back.
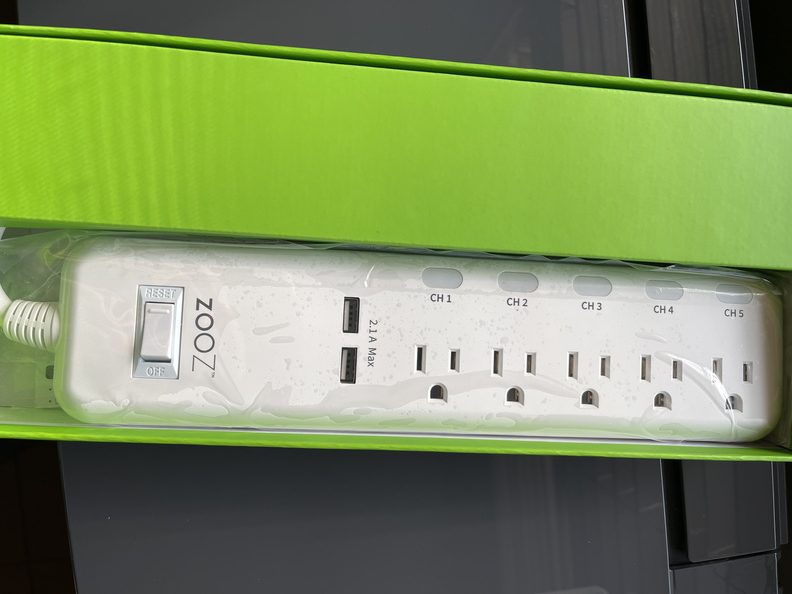
I eventually removed all of my Z-Wave devices from Pulse and paired them with HomeSeer without any problems. I even ended up getting a Z-Wave power strip, which has individually controlled outlets. I had always wanted to get one of those, but Pulse didn’t support them. Not a problem anymore! HomeSeer even sells their own Z-Wave hardware like light switches, sensors, etc. Their door/window sensors look very similar to the ones that came with my Ring system so if you were so inclined, you could probably just roll-your-own complete home security system with HS4 (just without the professional monitoring).
-
- Z-Tool+ inclusion app
-
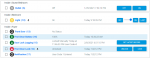
- my first three HS devices
-
- advanced Z-Wave parameters

-
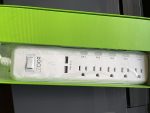
- Zooz ZEN20 Z-Wave power strip
Events
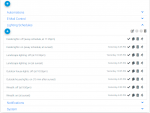
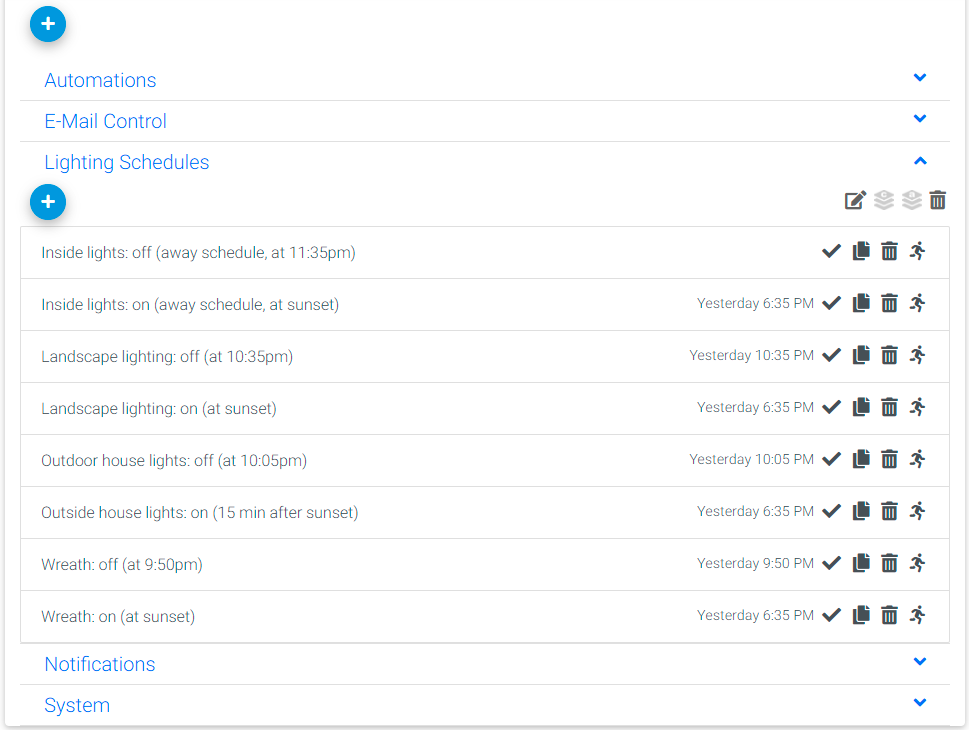
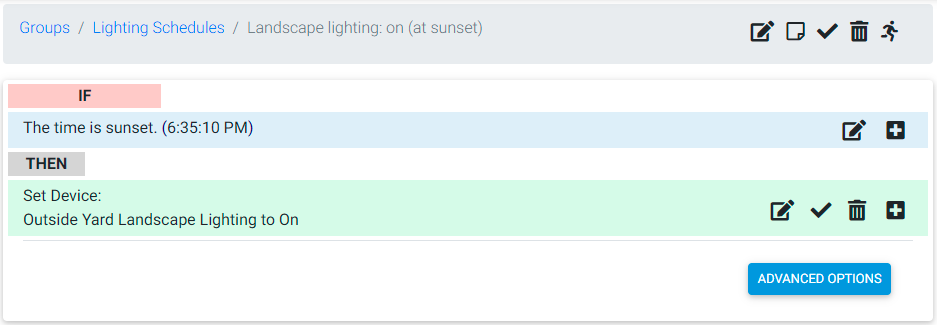
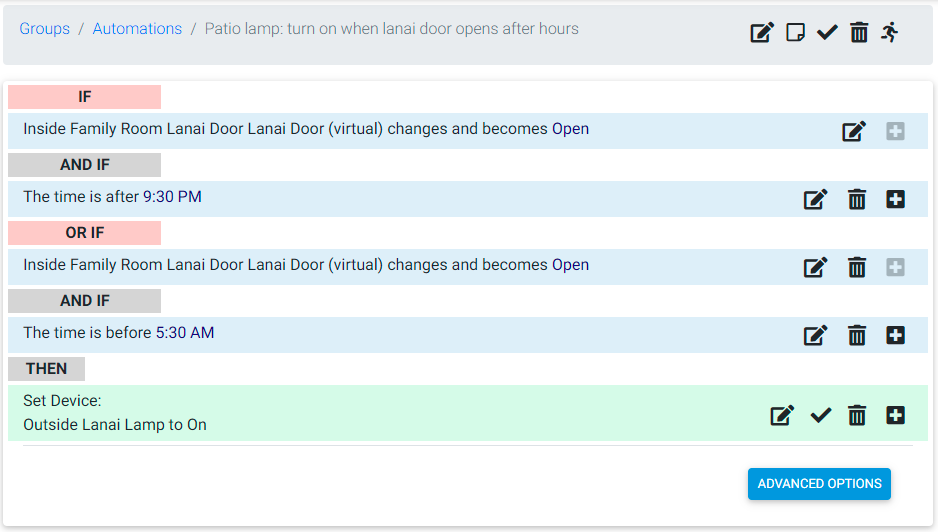
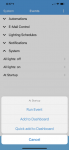
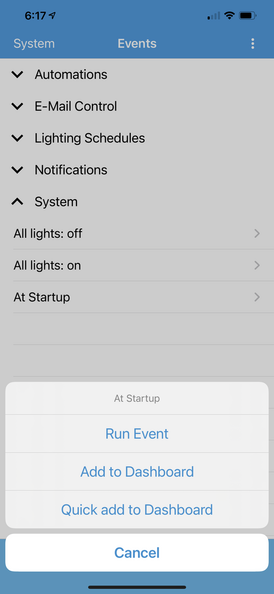
Great, so I had a few devices added and could control them from my browser. But the point of this exercise is automation, right? For that, you need to create some events. Just like with Pulse, HomeSeer events can be time-based (turn on the landscape lighting at sunset, and off at 10:30pm), triggered by device status changes (when the garage door opens, turn on the lights), some combination of those (when a door is unlocked after sunset, turn on a light), or even other events. Unlike Pulse, there are a lot of other advanced event options like receiving an e-mail, timers and counters, even spoken phrases (although that requires a microphone connected to the controller, and I have Alexa for that kind of thing). The point here is they’re pretty flexible and powerful and use an “IF trigger THEN action” syntax (with AND and OR operators as well). You can also create your own logical groups to keep your events orderly and sorted (notice the large blue text groups I created in the screenshot below like Automations, Lighting Schedules, etc.).
It was relatively easy to replicate a few of my automations from Pulse in HomeSeer, except for the ones that were based on my ADT door and window sensors. This is where the separation of my home security and home automation systems got a little tricky, but more on that in my next post.
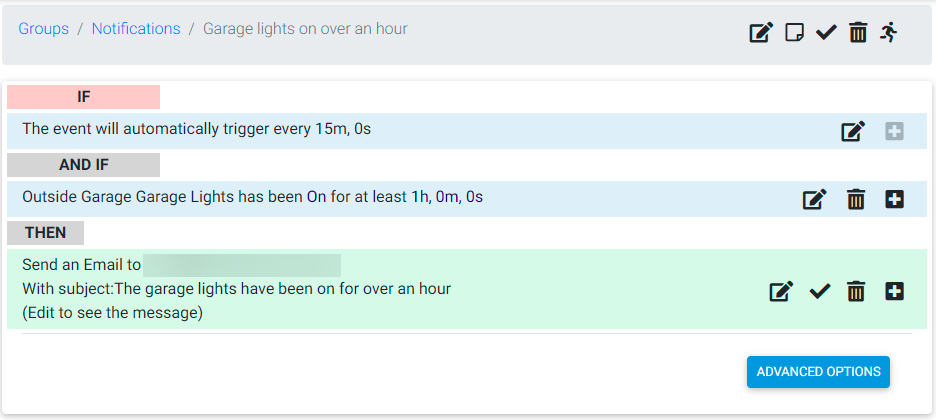
I really like having the ability to send e-mails from events. It might seem old school in this era of mobile apps, but I put together a whole series of “Notification” events that send me text messages for specific things, like if the overhead garage door is open for more than an hour. And while I could use the mobile app (below) to close the garage door after receiving that alert, I created other events that let me send an e-mail (by replying to the text message) back to HomeSeer to have it close the door (or reset the timer for another hour if, say, I’m working outside and know the door is open). Don’t worry … you can specify which e-mail addresses HomeSeer will accept e-mails from so not just anyone can close my garage door via text message. Granted, I haven’t tried spoofing my sending address yet, but given the fact someone would need to know which e-mail address to send to and from along with the specific syntax of the command I’ve set up to control certain devices, the likelihood of someone being able to use an e-mail message to remotely open my garage door is slim. With great power comes great responsibility. 🙂
-
- event listing
-
- simple scheduled event
-
- more advanced event
-
- recurring trigger with e-mail notification
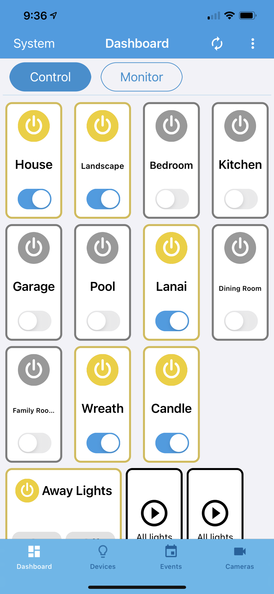
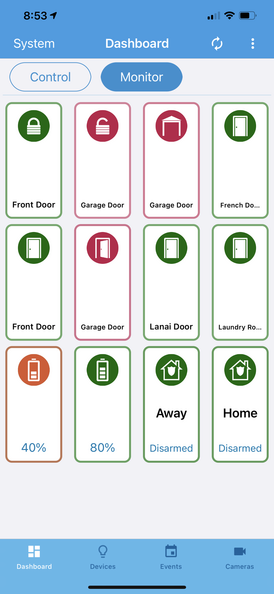
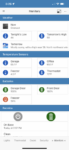
Mobile App
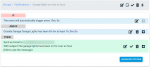
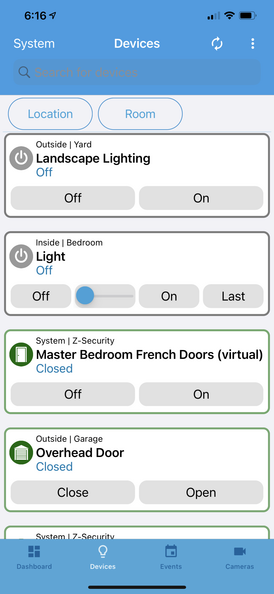
The free HomeSeer Mobile app uses the MyHS service to remotely connect to your HomeSeer system from your phone. It has a basic interface that lets you view and control your devices and events, and a custom dashboard function to create some custom screens. I created a simple dashboard for “control”-ing some my devices and another one for “monitor”-ing others. It’s basic, but functional. I’ve noticed the UI doesn’t always show the current state of the devices, so I need to tap the “reload button in the upper right-hand corner twice to toggle the automatic refreshing. This is one area where the mobile app for Pulse has a slight edge over my new setup.
For advanced dashboard design (like in-wall touchscreens), you can purchase the HSTouch Designer software for use with the HS3 Touch app. I’m not willing to shell out $300 for that though, so for now I’m sticking with HomeSeer Mobile. There’s also HSBuddy, a free third-party mobile app that (along with a plug-in) provides more advanced features like push notifications and geo-fencing that I might tinker around with when I get the chance.
-

- dashboard 1
-
- dashboard 2
-
- devices
-
- events
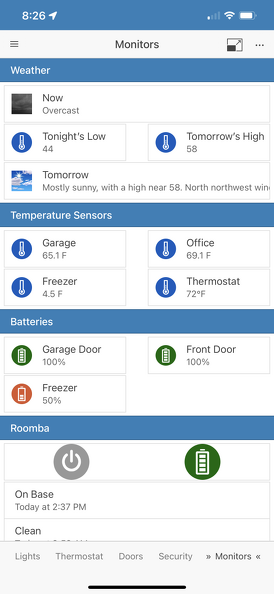
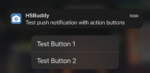
Update 01/23/2022: I’ve switched to HSBuddy for mobile interactions with my HomeSeer install … it’s way more flexible than HomeSeer Mobile. It took a while to create and tweak all of the dashboards I wanted, but I’m pretty happy with the result. The best part, though, is the ability to use push notifications for events, and associated action buttons. I’ve replaced all the text messaging on my events with HSBuddy push notifications. So now, for example, when I get a notification that the garage door has been open for over an hour, I can simply long press on the HSBuddy push message and then either press a button to reset the timer, or close the door, without the need to send a text message back to HomeSeer. Very slick.
-
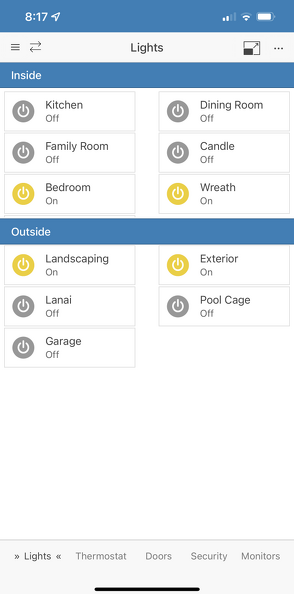
- dashboard (lights)
-
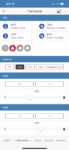
- dashboard (thermostat)

-
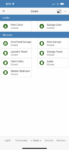
- dashboard (doors)

-

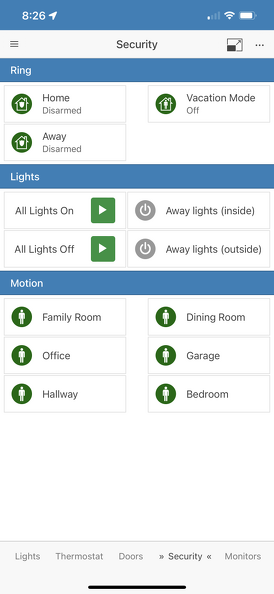
- dashboard (security)
-
- dashboard (monitors)
-
- iOS push notification with actions

Support
HomeSeer has been around for 22 years so it’s a pretty mature product and has a robust user community. The HomeSeer support forums are pretty active and have all sorts of sub-forums separated out by hardware, software (plug-ins), integrations, and developer info. I’ve found them to be pretty active and the people there helpful. There are a few HomeSeer employees that participate as well. I’ve also logged a few bug and support tickets and have had satisfactory interactions using that method as well.
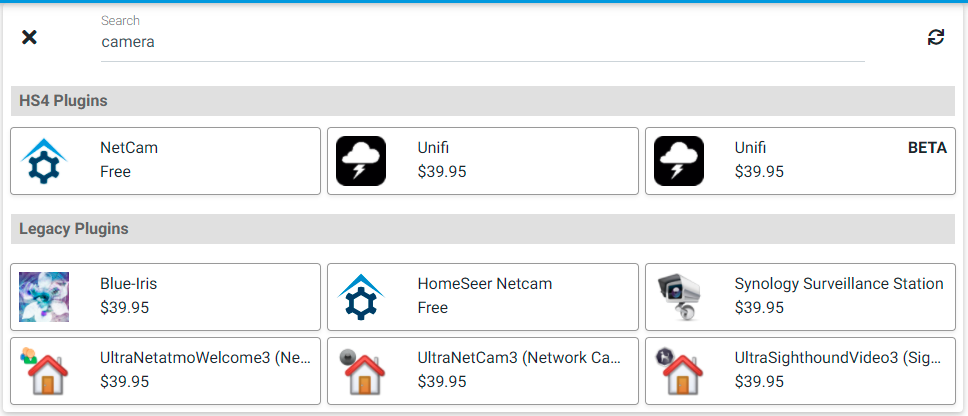
Plug-Ins
So far I’ve just written about HomeSeer and a single plug-in: Z-Wave. But the HomeSeer ecosystem has a wide variety of plug-ins that allow you to connect and expand your HomeTroller to other equipment and services. Free plug-ins include connectors to other smart home systems like Harmony, Philips Hue, Wemo, Tuya, SmartThings, etc.
I did make a noob mistake of thinking that by simply adding the Zigbee plug-in I could add Zigbee devices (like an old Philips Hue lightbulb I got for free from Amazon) to HomeSeer. You still need the hardware … doh! 99.9% of the devices I want to control are Z-Wave, though, so that’s fine. And I don’t need everything in HomeSeer. Yes, I could add the Rachio plug-in for my sprinkler controller, but they’re already controlled by the Rachio app and I don’t need to any automations based on Rachio events (flash a light when the sprinklers are running?). I’ve saw on the forums one customer who had a door sensor on their fridge which, when opened, triggered a HomeSeer event to check their step count via the FitBit plug-in and then play a piggy noise if they haven’t exercised enough! Try doing something like that will ADT Pulse! It’s all of these additional integrations that HS plug-ins enable that make it such a powerful automation platform. Plug-in authors are pretty active on the HS support forums as well.
There are a few gotchas, though. A lot of plug-ins are not free (averaging about $40 each) so depending on what you’re building, it can get expensive. The HomeTroller Pi is limited to 5 active plug-ins (you can install more, you just can’t activate more than 5 at a time) so you may have to carefully pick and choose or opt for the home expensive Windows-based HomeTrollers that don’t have a limit. Update: the new HomeTroller Pi G2 is the same hardware as my G1 but comes with a 32gb microSD card and has no plug-in limit). Out of the box, two of my plug-in slots were taken by Z-Wave and Z-Wave UI. It turns out that the Z-Wave UI plugin is “optional” (per the ticket I opened with HS Support) and can be removed, you just lose the newer, shinier HS4 UI for the Z-Wave interface, replaced with the older, slightly clunkier (but more functional?) HS3 UI (why the UI isn’t built into the plug-in itself, I can’t explain). Also, since HomeSeer is built with Microsoft’s .NET Framework it’s actually running under Mono on Linux. Some plug-ins are platform-specific and will only run on Windows or Linux installations, so check carefully when planning. Some plug-ins are also version specific … not all HS4 plug-ins will run on HS3 and vice versa. For example there’s a Nest plug-in, but it’s unsupported and only works with HS3 and requires a legacy Nest account, not a newer Google account. I’m hopeful that eventually a plug-in for the newer API will allow HomeSeer to connect with with my Nest thermostat, cameras and CO2/smoke detectors, but for now I’m fine with using the separate app like I’m used to (they didn’t integrate with Pulse either).
Right now I’m using just two plug-ins: BLOccupied, which makes it easy to randomize lights turning on and off (making an empty house look, well, occupied), and SDJ-Health, which monitors the battery levels in my door locks and sends alerts when they get low. Both of these things could be accomplished with some fancy HomeSeer event trickery, but using these free plug-ins makes it a lot simpler. Note that most third-party plugins start with the author’s initials (Blade and SteveMSJ in these instances).
-

- installed plug-ins
-
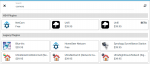
- searching for plug-ins to install
-
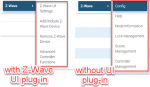
- Z-Wave menu differences (HS4 vs HS3)
Management
The HomeTroller is just another Windows or Linux box on your network so if you want to be more hands-on when it comes to management, that’s your prerogative. For the advanced user (like myself) you can SSH into the Pi and interact with the Linux shell (and I assume you can RDP into the Windows HomeTrollers in the same manner). My HomeTroller Pi is running Raspbian 10 (buster) with the 5.4.51-v7+ kernel. There are a lot of updateable packages listed by apt upgrade, most of which are libmono related, but I haven’t really gotten a clear answer on the forums yet if it’s safe to do a big OS-level update like that or if I should treat the Pi more like an appliance to stay on tested software levels. Update: I did finally end up doing a complete upgrade of all packages and the kernel and everything was fine.
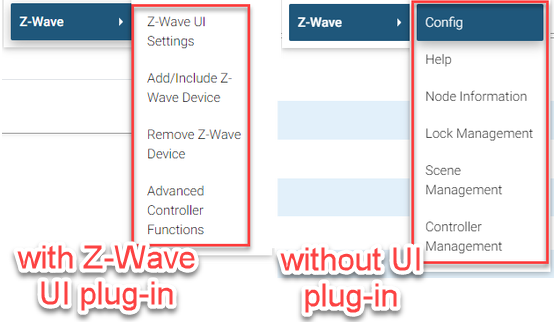
I did add my standard daily, weekly, and monthly maintenance scripts to cron, though, along with a few other typical bash shell customizations I use on my other Raspberry Pis to be consistent. I scheduled a daily configuration backup to my NAS (mounted via a CIFS entry in /etc/fstab) through the HS4 GUI, but am also doing weekly full backups of the entire Pi (via cron). I even installed Pulseway agent and the Nagios NRPE so I can monitor the HomeTroller just like my other servers.
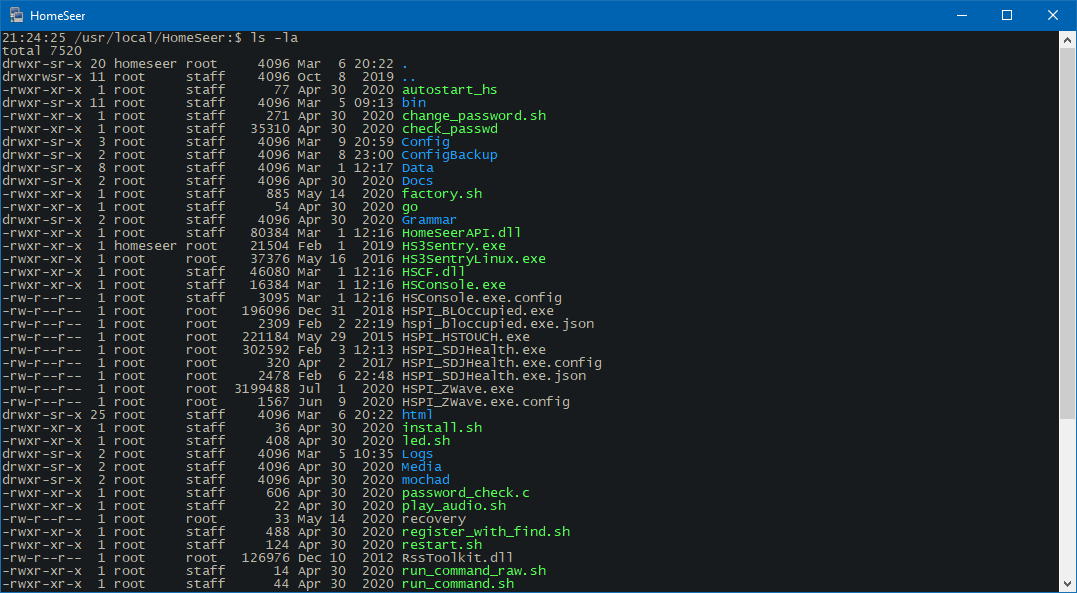
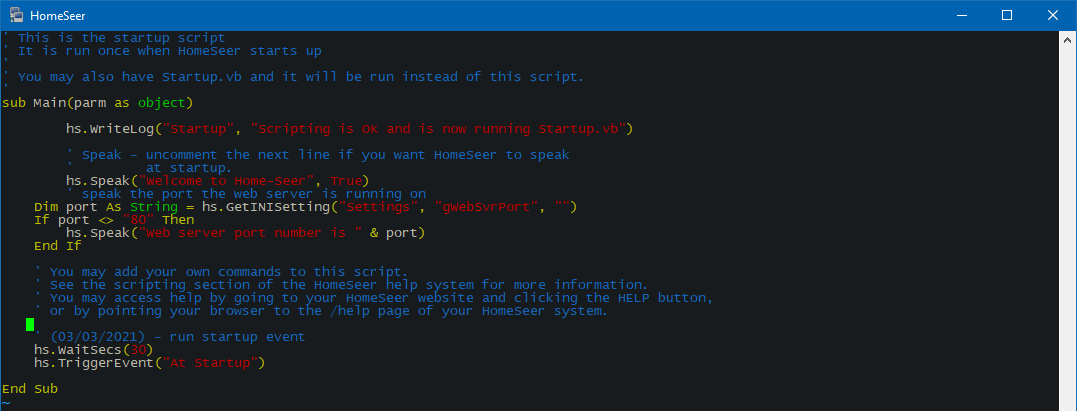
HomeSeer is installed under /usr/local/HomeSeer and this is where the configs, plug-ins, everything is located. It’s a little weird to see .exe files on Linux, but again that’s because HS4 is made up of .NET executables run through Mono. Access to this level of the software allows for even more customization (or possibility for screwing something up). For example, I added a TriggerEvent call to Startup.vb to run my “At Startup” event to kick off some HS housekeeping 30 seconds after the system boots.
I love the fact that I can control my backups and restores. There was no such feature in ADT Pulse to export or save your config … if something went wrong (and it did more than once during my nine years as a Pulse customer) the only option was to start over from scratch. Another reason people like HomeSeer is that it doesn’t rely on the cloud. If your internet is down, HomeSeer events and automations will still run. That was not true of Pulse. Of course, if you don’t use the MyHS cloud service you can’t easily control or monitor your system remotely (without doing some VPN and port-forwarding work), so you have to balance that privacy/convenience to your liking.
-

- scheduled config backups
-
- /usr/local/HomeSeer
-
- Startup.vb script mod
Ok, new home security system? Check. New home automation system? Check. Now, how to get them to work together? On to part 3 …
Very cool Windracer. I really appreciate these two posts. Right now I’m still OK with my combination of Pulse/Alexa/Harmony/irobot but I want to keep my options open. I’m a tweaker like you and want all the capability and flexibility to do complex programming and not be hamstrung by limited programming facilities like Pulse. For example, why can’t I program my roomba and brava (Hazel and Cha-cha) to let out random squeal sounds when they bump into furniture? I’ve accomplished a lot of complex automation with Pulse, but I always find myself wanting to do more.
So thank you for your really well-thought-out, complete and well-written posts. I’m looking forward to the next installment…
Sounds like you have a solution to a problem that all of us that use Z-Wave devices have with Pulse. Will Homeseer work with old Z-Wave devices. My devices are not Wave 2.
Yep, all of the original Z-Wave devices I put in back in 2011 when I first got Pulse paired fine with the Z-Wave Plus radio in the HomeTroller Pi. So not only do I have backwards compatibility, I can now slowly transition to newer Z-Wave Plus devices as needed.
That’s great, I’ve been looking to get away fro ADT Pulse. I’m going to give Homeseer a shot.
I’ve been looking to get away fro ADT Pulse. I’m going to give Homeseer a shot.
Followed your advice and got the Homeseer Troller PI. Got it running easily and in the process of deactivating my Z-Wave device from ADT and adding the Z-Wave devices to Homeseer. Also added the Plug-ins for Harmony and Hue. The only problem is that I’m not able to log into the IOS App. I researching this, the only thing that I see is to add, Json for it to run on the App.
Any idea?
I didn’t run into that from what I remember. One thing I can suggest is to restart the HomeTroller after making a change like that. I’ve found that some settings (like persistent logging) only took effect after a restart.
Also, you don’t happen to have a # in your HS password do you? Because I found this on the forums.
Found the switch for turning JSON on, but still doesn’t work.
I’m continuing to refine my HS events as I “debug” my automation code. My recent changes include learning how to cancel delayed actions and events.When you use a delay in an event or action (i.e., turn off a light “after x minutes”), HomeSeer actually schedules a new action or event for the appropriate time and they appear in the Events section:
Not accounting for delayed events can cause unwanted behavior. For example, I have a delayed event that will lock the doors and turn off the garage lights 5 minutes after the alarm system is armed (see the above screenshot). If, however, I disarm the alarm before that 5 minutes, the event will still trigger. There are special actions in events that allow you to cancel delayed actions and events, so I for the alarm example I just had to create an event that triggers when the alarm system is disarmed to remove any pending delayed events. This way the doors won’t lock if I disarm the system before that 5 minute delay expires:
I’ve also added one more plug-in, BLRoombaWiFi. The setup is a little involved since you need to be able to get the password and ID your robot uses to communicate with the iRobot mothership (see here), but once it’s linked, you can control your Roomba through HomeSeer. Yes, I know, I already use the Roomba app to schedule cleanings and such, so why bother? With my Roomba i7 connected to HomeSeer, I can now trigger cleanings based on events. So now in addition to the scheduled cleanings, I can also have Roomba vacuum the whole house when the alarm system is armed in away mode, for example, and then cancel the cleaning when the alarm system is disarmed. This is a lot better than relying on geo-fencing since the Rooma app doesn’t support multiple devices (so the Roomba would start cleaning if I left the house even though my wife is still home).
Finally, I’ve added some additional devices to experiment with: the HomeSeer HS-FS100 Z-Wave temperature sensor, which I have in our chest freezer in the garage so I can monitor for power outages:
And a HSM200 Z-Wave multi-sensor, which can sense motion, temperature, luminance, and has a multi-colored LED you can set (again, based on events):
Back in July, Homeseer released the HomeTroller Pi G2. It’s still based on the same Raspberry Pi 3 as my G1 HomeTroller, but supports unlimited plug-ins and has a 32gb microSD card. Apparently they’re doing something different with memory management that requires the larger card which in turns removes the plug-in limit.
If you do a self-install of HS4 on a Pi, as long as you have a 32gb or larger microSD card, you can take advantage of that new feature as well. I’m waiting to see if I can possibly crack open the case on my G1 and replace the 16gb card with a 32gb one to remove the limit so I don’t have to buy a whole new device.
edit: well that didn’t take long, the G2 has now been replaced by the Pi G3. From what I can tell looking at the specs, it has a new 700 series v2 Z-Wave chip, and is built on a Banana Pi board instead of the traditional Raspberry Pi 3 B.
I just had a new HVAC system put in and part of the install was a Honeywell TH8321WF1001 VisionPRO 8000 thermostat. While I was hesitant at first to lose my Nest thermostat, I let them install it and decided to at least give it a fair shot. The UI and aesthetics of the Honeywell are a big step backward but I was able to connect to Homeseer with the Honewell WiFi Thermostat plugin from skWare.
This is a paid plugin, so I’m currently using the 30-day trial, but it seems to work pretty well. I was able to link it to my TCC account and then set up events in Homeseer to control setpoint schedules, vacation mode, etc. So it’s actually a little more integrated into my home automation system than the Nest was.
Unfortunately, to try out this plugin I had to disable another since my G1 HomeTroller has the 5 plugin limit. I’ll have a decision to make soon (either upgrade to the G2 or attempt to upgrade my G1 with a 32gb microSD card and transfer over all of my config) if I decide to purchase the plugin.
I’ve upgraded my HomeTroller Pi with a 32gb microSD card, eliminating the 5 plugin limit! It was actually a relatively easy and smooth process.
First, of course, I made several backups: the internal HS4 backup, the Z-Wave controller backup, and a full image backup of the existing 16gb microSD card. While the backups were running, I used balenaEtcher to flash the latest HS4 image (HS4PiV5-072621) on a new 32gb microSD card.
Once the backups were complete, I shut down the HomeTroller, opened the case (4 screws) to expose the RasPi and its Z-Wave daughter board:
I replaced the 16gb card with the new 32gb one and then powered the HomeTroller (still disassembled) back up. Since the hardware was the same (although the hostname changed), the unit pulled the same IP address lease from my DHCP server and I was able to connect with my browser to activate my HS4 license on the new card. Once logged into the HS4 interface, I restored the HS4 backup in the UI. When the restore was complete, I rebooted the unit, logged back in, and I was back in business! It turns out the HS4 backup includes the Z-Wave controller info so all of my paired devices still worked. The only odd omission: my plugins. I had to re-download and install my plugins, but once they were activated, they picked up their existing configs and worked just like they had before. Satisfied, I re-assembled the case and put the HomeTroller back in the closet with my other networking equipment.
Two minor things: the HS4PiV5-072621 image only has a 69mb boot partition, so
rpi-updatecomplains that it might be too small to contain kernel updates (typically this is supposed to be 256mb). Not a big deal, I’ll probably just use gparted to expand the partition later. Also, the time zone defaulted to UTC which I didn’t realize at first until my events started firing at the wrong times. 😀 I guess since that’s an OS-level setting it’s not part of the HS4 backup.So all in all, the upgrade was pretty easy! It probably took me longer to put back all my Linux-level changes (shell customizations, cron jobs, mount points, etc.) than it did to get the core HS4 functionality working on the new card. And best of all, I was able to install more plugins! I’m up to seven now. 😉 Much easier (and cheaper!) than buying a new G2 unit.
I finally got around to fixing the /boot partition on the new SD card.
First, I made a backup image of the entire SD card using Win32 Disk Imager following these instructions. Then I mounted the SD card on my Linux server and used gparted to delete and recreate the boot partition following these instructions.
But after that, the Pi wouldn’t boot! 😮 I was seeing 7 green LED flashes which, after some Googling, I determined meant the bootloader couldn’t find the kernel image. After going down a rabbit hole about Raspbian and NOOBS partitions, I figured out the issue: when I deleted and re-created the /boot partition, the partition number changed from 6 to 7, and the /root partition number similarly changed from 7 to 6. I ended up edited the following files:
And finally the Pi (and HomeSeer) booted again, whew!! The /boot partition now shows the full 512mb. I still have ~1gb of “wasted” unallocated space at the end of the SD card, but I can’t add it to the root partition because its outside of the extended partition created by NOOBS. At some point I might want to re-create the SD card in standard Raspbian format (two partitions only), but that’s enough tinkering for now.
I’ve also switched to HSBuddy instead of HomeSeer Mobile and added some details to the “Mobile” section above.
I’ve upgraded to a 64gb card with no “wasted” space!