 Hey, just so you know ... this post is now about 5 years and 2 months old. Please keep that in mind as it very well may contain broken links and/or outdated information.
Now that I’m semi-comfortable with the 3D printing process for my Ender 3 Pro (download/create model, slice STL in Cura, save GCode to micro SD card, put micro SD card in printer, print model), I wanted to eliminate the “sneakernet” step of manually shuffling the SD card between my PC and the printer and enable some more monitoring options (eliminating another sneakernet connection: walking back into the office every now and then to check on the printer!).
Enter OctoPrint: “the snappy web interface for your 3D printer that allows you to control and monitor all aspects of your printer and print jobs, right from within any browser on your network. It runs basically everywhere, from a Raspberry Pi to your gaming rig, can be easily extended thanks to a powerful plugin system, and is Free and Open Source Software.” Specifically, I’m using the Raspberry Pi-enabled version, OctoPi.
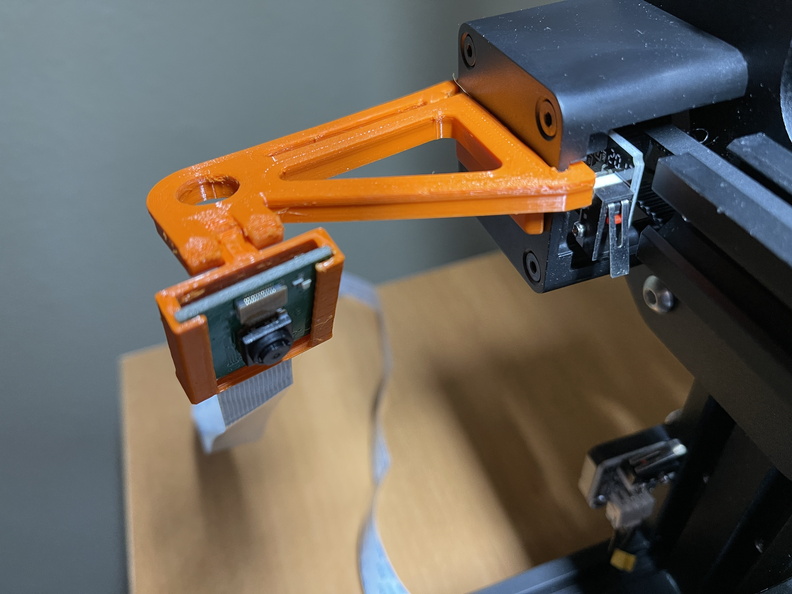
I initially tested the latest OctoPi image on my spare (original 2012) Raspberry Pi Model B. As expected, performance was very slow, but it gave me a chance to get a feel for the setup, features, and UI while I was waiting for a new Raspberry Pi 4 Model B and accessories to arrive. In addition to a power supply, I also got a cooling fan and compatible camera (with a long ribbon cable). I also printed a cool case model I found on Thingiverse to house the Pi right underneath the LCD of my Ender 3 Pro (my biggest, longest print so far).
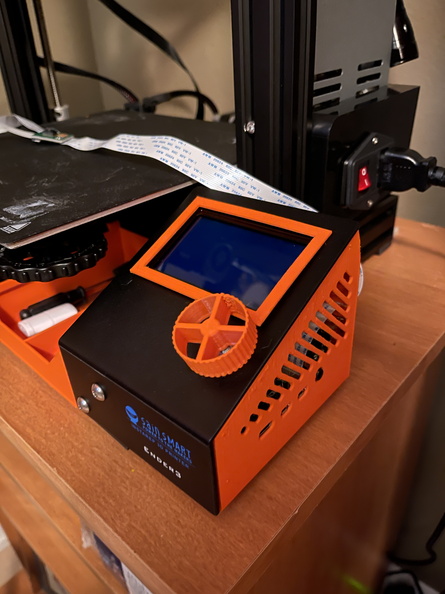
Once all the new hardware arrived, I imaged a 64gb micro SD card with the latest release candidate version of OctoPi, installed the Pi, fan, and camera in the case, and got everything assembled and running. I printed some cable clips for the Ender’s frame to keep everything nice and tidy, and also printed a mount for the camera. I had to use the “tape trick” on the USB cable going from the Pi to the printer to prevent the 5V from back-powering the Ender’s LCD panel even when the printer itself was off. I could run a wired ethernet cable from my office switch to the Pi, but for now I’m just using my WiFi, which seems to be fine (unlike my other Pis, this one won’t be running all the time, just when printing).
-
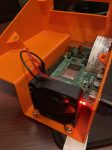
- Pi and fan in case

-

- new assembled LED enclosure
-

- camera and mounting bracket
-

- the new setup

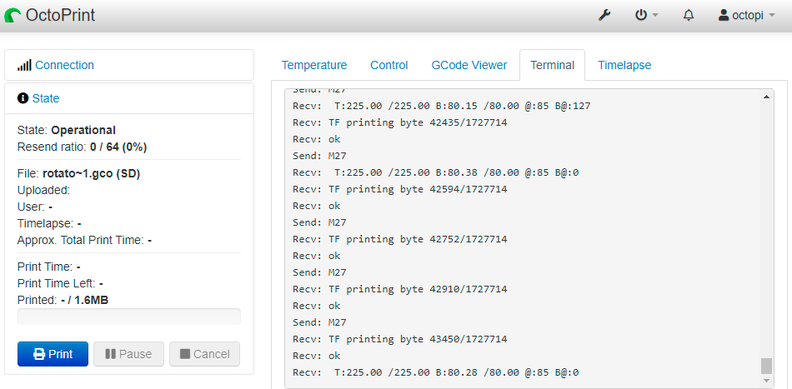
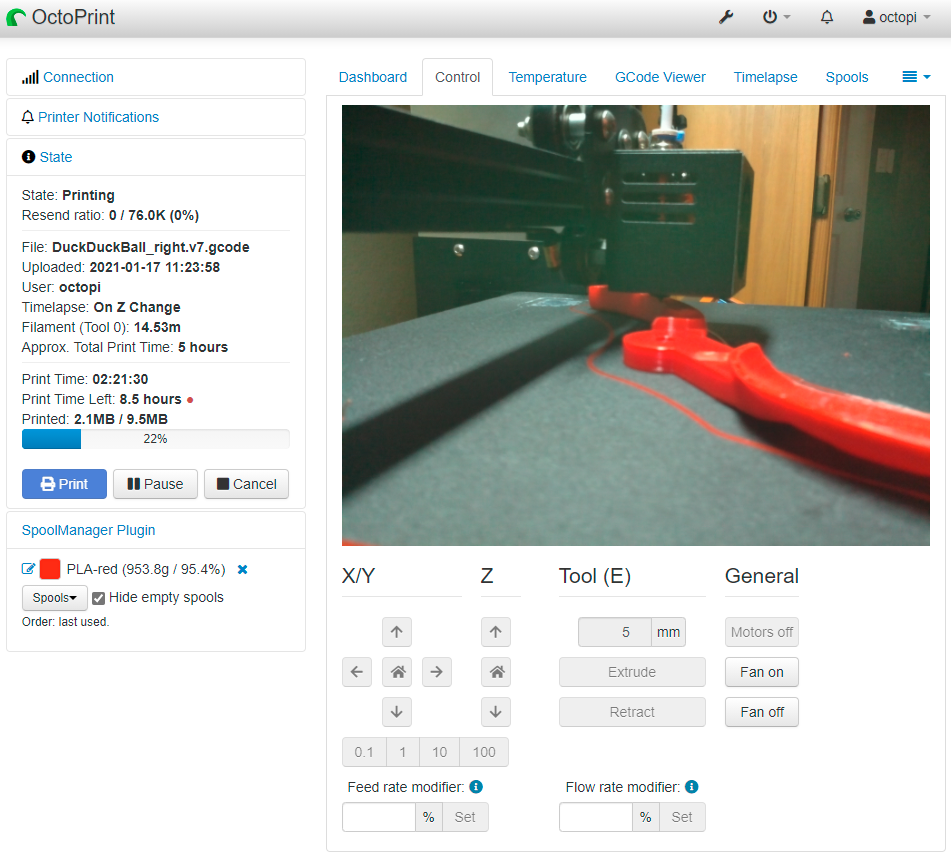
With OctoPrint up and running, I just pointed my web browser at the OctoPi’s IP address and went through the initial setup and config (printer profile, features, appearance, etc.). Then I was able to upload a Cura-sliced GCode file via the web interface and start the print. No more SD card shuffling! Using the tabs on OctoPrint’s main screen, you can monitor and control almost all the aspects of your print: the Temperature tab lets you set and monitor the temperatures of your bed and nozzle(s); on the Control tab you can move the X/Y/Z axes, control the fans and stepper motors, and view the webcam (more on that later); the Terminal tab allows you to interact with your printer via the command-line and watch the GCode commands being sent and processed; and the GCode Viewer shows you the current model info and lets you view the current layer as it’s being “drawn” (very cool and almost as mesmerizing to watch as the printer itself!):
-
- Temperature

-
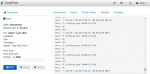
- Terminal
-

- GCode Viewer
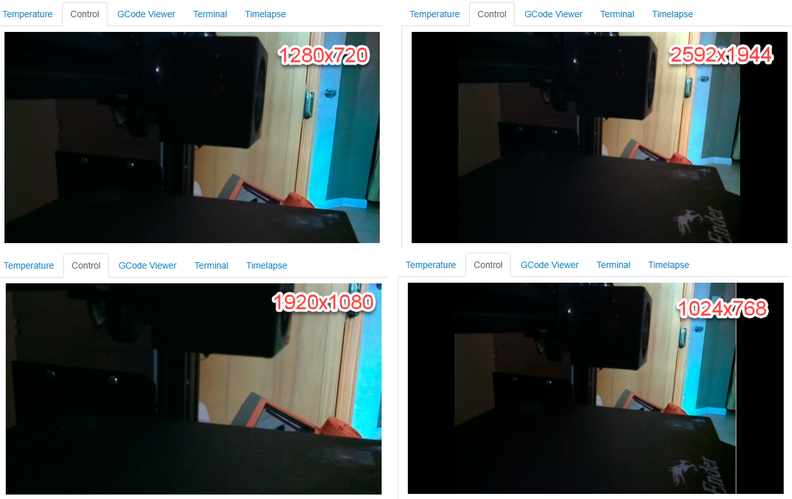
The other big reason people use OctoPrint is for timelapses, which is why I included the Arducam 5MP webcam and long ribbon cable in my setup. With the camera attached, OctoPrint’s built-in feature lets you configure the various aspects of the timelapse including when to take the snapshot (on a timed interval, or only when the Z-axis changes), the framerate, etc. Then, when printing, you can enable the timelapse and OctoPrint will take still images per your settings and then at the end stitch them all together into an MP4 video (downloadable via the UI) This is a much better (and quicker and easier!) setup than my initial timelapse attempts using a video camera and editing software. I did have to play with some low-level config files (specifically the camera_raspi_options in /boot/octopi.txt) to get the proper resolution on the Arducam. I found that if I used any 16:9 resolutions, the image was zoomed into the center of the frame. Once I figured out its 5:4 aspect ratio and native resolution of 2592×1944 (not quite QSXGA), I was able to get as wide a frame as I could. As you can see from the comparisons below, I could probably drop down to 1024×768 and still get basically the same image with less of a performance impact, but so far the RasPi 4 seems to be fine so I’m sticking with the native resolution. I still need to play around with the settings to get an acceptable timelapse, and I’m thinking having the camera attached to the Z-axis (sample) as opposed to a fixed position (sample) may be a better setup.
-
- camera resolution comparisons
-
- Control tab with webcam
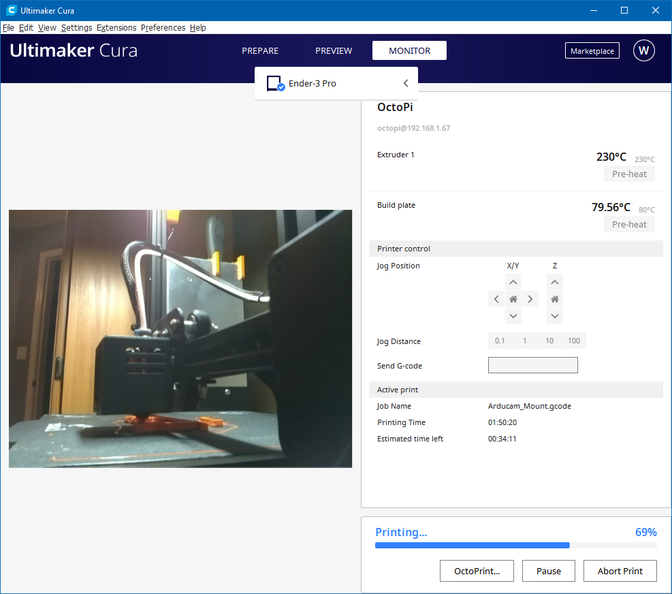
OctoPrint’s plug-in community is great for further customizing the experience. I added the OctoPrint Connection plug-in to Cura which lets me upload sliced GCode files directly to OctoPrint and watch the progress on the Monitor tab. I found a mobile app called OctoClient which lets me watch my prints on my iPhone. There are all sorts of plug-ins that let you customize the UI, add additional features, etc. It’s a great community. I might check out OctoLapse next which, among other things, lets you move the nozzle out of the frame before it takes a snapshot for the timelapse which gives you results like this (pretty slick!).
-

- OctoPrint monitor in Cura
-

- OctoClient on iPhone

-
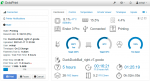
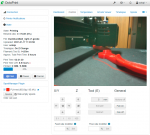
- Dashboard plug-in

I’m only a few days into my OctoPi setup, but so far I am really liking it! More to come, I’m sure …
I tried a timelapse using the Z-axis change (instead of timed) and the results are a lot nicer:
Still need to dial it in, but getting better!
I got Octolapse working and here’s my first big print with it:
Very cool!