 Hey, just so you know ... this post is now about 13 years and 5 months old. Please keep that in mind as it very well may contain broken links and/or outdated information.
TiVo’s mobile app for iOS is great when you’re sitting on the couch watching TV, but it has limited functionality when you’re out and away from your home WiFi network. The remote control and Info features aren’t available in Away Mode which up until now hasn’t been a big deal (why would you want to change the channel on your TV if you’re not at home?). With the recent release of the TiVo Stream and v2.0 of the app, however, there has been renewed interest in accessing the full functionality of the app while away from home … primarily for streaming Live TV and recorded content when not on your home network.
The obvious technical solution to a problem like this is a VPN connection to your home network. But in the case of TiVo it’s unfortunately not that straightforward. It wasn’t easy, but I got it working (sorta, more on that later). So if you don’t mind tinkering with your router, tweaking network settings, and jailbreaking your iOS device, grab a cup of your favorite beverage, roll up your sleeves, and read on …
Background
TiVo boxes and the TiVo iOS app use Bonjour to communicate, which is based on mDNS. Multicast traffic won’t traverse subnets, however, so even if you were to configure your router to open the proper ports to make your TiVo “visible” to the public internet, the Bonjour traffic from your TiVo isn’t going to make it out to your iPad on the WiFi at Starbucks or over 3G to your iPhone. A lot of VPN clients don’t support mDNS, including, most pertinent to this discussion, the one built into iOS. So how is this going to work?
The Tools
Here’s what I used in my proof-of-concept test:
- Buffalo WZR-HP-G300NH2 router running DD-WRT v24-sp2
- the TiVo app for iOS (tested with versions 2.0.1, 2.0.2, and 3.0.1)
- iPhone 4S running iOS 6.1.2 (jailbroken, originally tested on 5.1.1)
- original WiFi-only iPad running iOS 5.1.1 (jailbroken)
- GuizmOVPN v1.1.9 (trial)
- My3G v5.3.2 (trial)
- xCon v39~beta4 (also tested with v38, which contained the original fix)
OpenVPN (server)
The key to my success was OpenVPN, an open source SSL VPN project. When I started researching the VPN/multicast problem I found that the latest version of GuizmOVPN for iOS (available in Cydia for ~$6 with a 7-day free trial) supported multicast relay so I decided to use that as my base test. I had already been using a PPTP VPN for remote access to my home network for some time, but started reading up on configuring OpenVPN under DD-WRT instead. Here’s the resulting OpenVPN server configuration file on my router:
dh /tmp/openvpn/dh.pem
ca /tmp/openvpn/ca.crt
cert /tmp/openvpn/cert.pem
key /tmp/openvpn/key.pem
keepalive 10 120
verb 4
mute 5
log-append /var/log/openvpn
tls-server
management 127.0.0.1 5002
management-log-cache 50
mtu-disc yes
topology subnet
client-config-dir /tmp/openvpn/peers
script-security 2
port 1194
proto udp
cipher bf-cbc
auth sha1
ifconfig-pool-persist /tmp/openvpn/ip-pool 86400
client-to-client
push "redirect-gateway def1"
fast-io
server-bridge 192.168.1.5 255.255.255.0 192.168.1.210 192.168.1.215
dev tap0
push "dhcp-option DNS xxx.xxx.xxx.xxx"
push "dhcp-option DNS yyy.yyy.yyy.yyy"
fragment 1300
A lot of that is default setup, and you can also use whatever encryption/hash/compression options you wish (Blowfish/SHA1 isn’t the most secure but I was going for speed over security in this test) although I recommend getting a basic VPN connection working first before tweaking). Some more details on the lines in bold red:
- dh/ca/cert/key: these are the certificates you need to generate as part of the OpenVPN install (see the HOWTO for instructions on setting up your own certificate authority (CA) and generating client certificates).
- dev tap0: we need to use TAP (bridging) for the OpenVPN server mode. This is important because the device connected to the VPN (iPhone) needs to be on the same subnet as your home network.
- proto udp: UDP is the tunneling protocol we need to use for the VPN connection since that’s what mDNS uses and that’s what were trying to get working.
- push “redirect-gateway def1”: the “Redirect default Gateway” option ensures all traffic is routed through the VPN connection.
- push “dhcp-option DNS xxx.xxx.xxx.xxx”: since all traffic is being routed through the VPN, I had to add these lines so my device could resolve internet addresses properly. Replace with the address(es) of your own DNS servers.
- fragment 1300: during my initial testing I was able to ping other devices on the local network from the VPN just fine but when I tried to actually connect to one (say, SSH into my Linux server) the connection would fail. Adding this seemed to fix the problem. YMMV.
OpenVPN (client)
Now that we’ve got an OpenVPN server running on the local network, we need to configure our iOS devices that will be connecting to it. Unfortunately there aren’t any Apple-approved OpenVPN clients in the App Store so your device will need to be jailbroken to go on from here. As I mentioned earlier, I used the trial version of GuizmOVPN for my testing. After you’ve installed the app on your device you’ll need to upload a .ZIP file containing the client and CA certificate files and an OpenVPN configuration file (.ovpn). GuizmOVPN has a built-in web server to facilitate this. The OpenVPN config file for my iPhone looks like this:
client
dev tap
proto udp
remote my-vpn-domain.com 1194
resolv-retry infinite
nobind
persist-key
persist-tun
ca ca.crt
cert iPhone.crt
key iPhone.key
ns-cert-type server
verb 3
fragment 1300
Again, regarding the lines in bold red:
- dev tap/proto udp/fragment 1300: logic dictates your client settings need to match the server so we need to tell the client to use TAP and UDP to connect. Since I added the fragment directive on the server, I did so on the clients as well.
- remote my-vpn-domain.com 1194: substitute your public IP address or domain here. The default port for OpenVPN is 1194 so leave that unless you’ve used a different port on the server-side.
- ca/cert/key: these lines point to the certificates for the CA and the client. You should have these three files in the same .ZIP archive you upload to GuizmOVPN along with the config file. Make sure the names match for each.
If the upload to GuizmOVPN goes well, you should have a connection listed on the General tab of the app. On the Settings tab, I left “DNS Push” and “Keep DNS” on and at the very bottom under Extras I enabled “Multicast.” That turns on the multicast relay through the VPN, the key to getting this all to work! Once your config file is uploaded you can edit it directly on your device by tapping on the connection on the General tab and then using the Editor tab at the bottom of the next screen. This comes in handy if you need to tweak settings without having to re-upload a .ZIP file each time.
Making a Connection
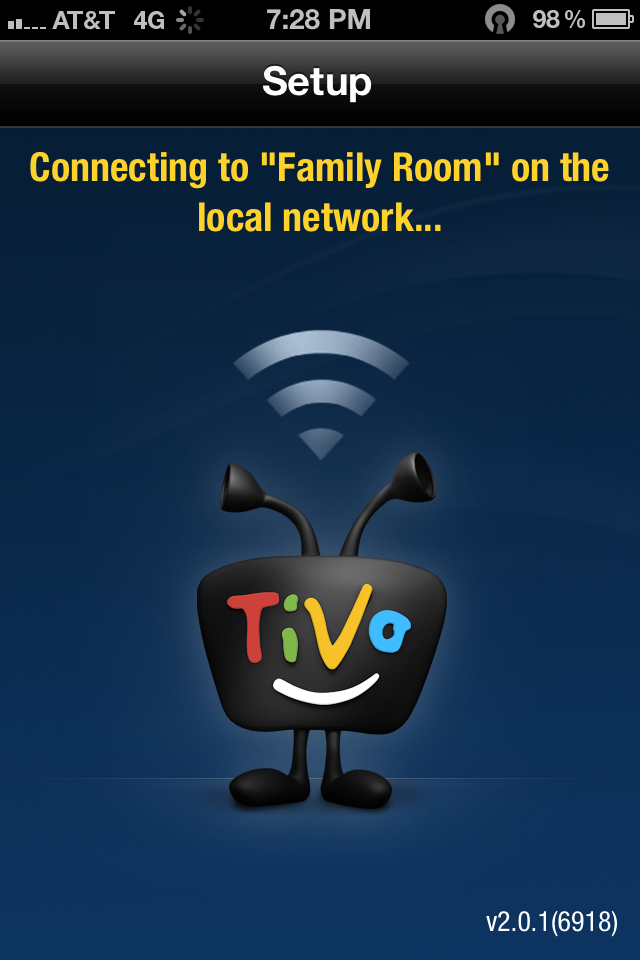
Assuming you’ve got everything set up correctly on both sides it’s time to establish a VPN connection. Note that this probably won’t work if you’re already on your local network (without some extra fiddling that I’m not going to cover here) so make your first test connection over 3G if possible. On my iPhone, I turned off wireless, then opened the GuizmOVPN app, and tapped the “Connect” slider to ON. Now tap on the Log tab at the bottom of the app and watch your device negotiate a connection with your server and (hopefully) connect!
If it doesn’t work on the first try (and trust me, it didn’t for me!) you’ll need to review the logs on your client and server to see if you can figure out the problem. Google is your best friend here. But once you do have a successful connection you should see an OpenVPN icon at the top of your iOS device’s screen, next to the battery indicator. You can also tap on the lower-case “i” icon next to the OpenVPN logo on the General tab of GuizmOVPN to display a status screen which should show your device’s new network info (it should match your home network) along with a “Traffic redirected” status which should read “YES” due to the redirect gateway directive in our OpenVPN server config.
Let’s not jump into the TiVo app just yet, though. Test your connection by opening the web browser on your device and trying to connect to your router’s web-based administration page (ex. 192.168.1.1). You should also be able to access public web sites, like google.com. Keep in mind all traffic is going through the VPN and your home router so your upstream broadband speed is going to come into play. If all of that works, congratulations, you’ve made a successful VPN connection to your home network via OpenVPN!
Using the TiVo App
The TiVo app was designed to be used at home on local WiFi so we still have a few minor hoops to jump through. Starting with the v2.0 release (the first version with support for the TiVo Stream), the app would check for a jailbroken device and fail to launch. It is generally understood that TiVo had to do this to get CableLabs’ (and the content providers’) approval for the Stream, ensuring that downloaded or streamed content couldn’t be extracted from the device. It didn’t take long, luckily, for the geniuses behind xCon to release an update (in beta) of their jailbreak detection preventer tool to bypass this.
Note: as of v2.0.2 you don’t need xCon if you just want to use the TiVo app normally, but you’ll still need it if you own a TiVo Stream and want to use the streaming/downloading features it provides. I don’t own a Stream, though, so I have not tested this first-hand. If you’re reading this it’s probably because you own a Stream and want to use it outside of your home, though, so you’ll need xCon.
Almost there … one more app. Again, since the TiVo app was designed for use over local WiFi, if you’re connected to your VPN through the cellular network (i.e., your AT&T iPhone, Verizon LTE iPad, etc.) the app will say “Away from Wi-Fi Network” and prompt you to go into Away Mode … not what we want! To get around this, we need another Cydia app called My3G from Intelliborn. My3G costs $4 and tricks specific apps on your iDevice into thinking they are on WiFi when really they are on 3G. Like GuizmOVPN, there’s a free trial available so you can make sure everything works before you buy. Once installed, enable it for the TiVo app (I also had to turn on Direct Mode).
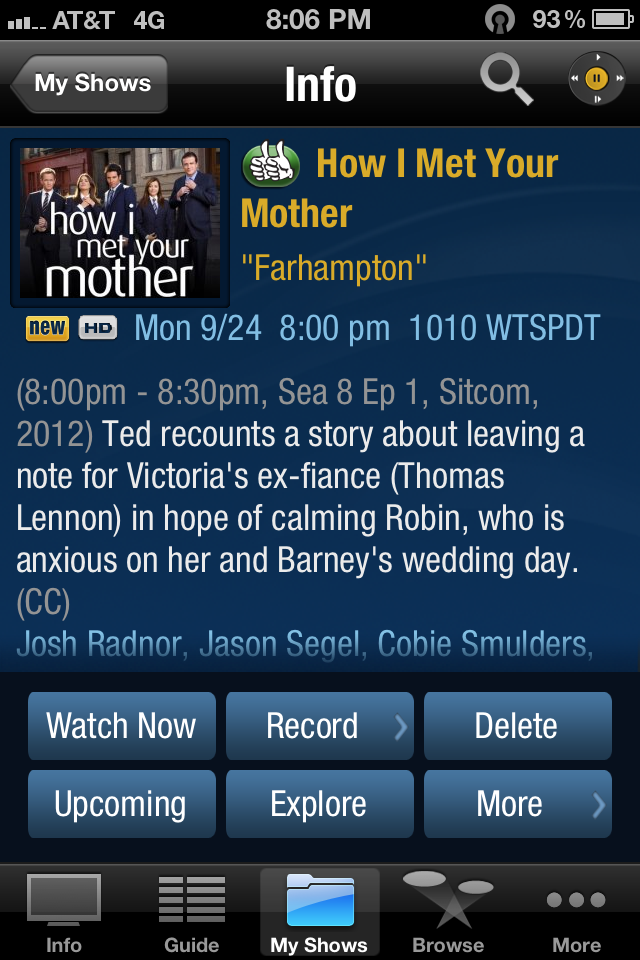
Ok, ready? Launch the TiVo app and keep your fingers crossed. If you’re lucky, all of the pain and suffering you’ve just endured will be rewarded when the app connects to your TiVo at home. In my tests the app functioned normally: I could see what was currently on Live TV on the Info tab, bring up the Remote and change channels, start playback of a recording from My Shows, all as if I was at home sitting on the couch.
The Caveats
Unfortunately, there are a lot of them.
- I actually had very little success getting the TiVo app to work over a VPN connection from my iPad or iPhone connected via WiFi. I tried the WiFi at work, the public hotspots at Starbucks and the airport, but only had it work once and then could never replicate it. The VPN connection was fine, but something must have been interfering with the multicast relay which prevented the TiVo app from finding any of my DVRs. All of the traffic should have been going through the VPN tunnel so I’m stumped as to why I could not get it working, especially since it works fine on my iPhone over AT&T 3G. I’m hoping someone else with a similar setup will be able to confirm whether or not this actually works. So the caveat here is there could be any number of other factors that prevent this from working altogether.
- I don’t own a TiVo Stream, so I can’t confirm that the streaming/downloading function works over a VPN connection as described here. Additionally, I would imagine your experience would be heavily dependent on your upstream bandwidth. From what I’ve read the Stream is pretty good at transcoding for the iPhone/iPad but if you’re trying to stream over a 768k uplink, your TV-watching experience may be less than ideal.
- The TiVo app could detect and prevent VPN connections in the future similar to how it detects a jailbreak today. The Brighthouse TV app already does this: even with a bridged VPN connection I still can’t watch my cable TV on a mobile device unless I’m physically in my house. Grrr.
- I don’t have access to a rooted Android device but I did see there are a few OpenVPN clients in the Play Store that support TAP. Theoretically my steps here should work on Android but I’ll leave that exercise to someone else. The current version of the TiVo app for Android doesn’t support the Stream but it’s assumed it will detect rooted devices just like it does for jailbroken iOS devices when it’s released so that will be a hurdle as well.
- Finally, I’m not a network expert nor am I a lawyer. I performed and documented this test as a “geek exercise” just to see if I could get it to work. Always make sure you understand the security implications of exposing your home network to the internet. And although jailbreaking is legal, bypassing some of these restrictions on where and how you can watch your content could still be considered a gray area by some. None of the apps or methods I used here are illegal (to my knowledge) but just keep all of that in mind.
What’s Next?
I set out just to see if it was possible to use the TiVo app over a VPN connection. Is it a lot of steps and moving parts? Yes. Is it worth it? I guess that’s up to you to decide. Hopefully, if nothing else, this post helps someone else build on what I’ve discovered so far, corrects me where I was wrong, improves on what wasn’t quite right, and comes up with a more reasonable solution for the TiVo user community. In the meantime, I’ll update this post if I make any more headway or discoveries myself.
-

- Show Details with Watch Now
-
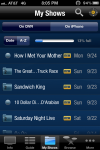
- My Shows over 3G

-

- Info tab over 3G

-

- connecting to Premiere over 3G
-

- OpenVPN connection via GuizmOVPN

I have been able to successfully get my iPhone 5 to run live tv via the BHTV app — however since I cannot jailbreak my phone yet, I have not been able to get the TiVo app to function outside of home – — and with the large amount of copyright restrictions (preventing me from downloading a show to my idevice for viewing later) I have found the stream to be nearly useless. Is there any way to get bonjour and mDNS to work without jail breaking? Maybe via an opendns service or similar? Any help would be greatly appreciated!’
Thanksd
Dan
To my knowledge, no one has gotten the Stream to work over VPN on a stock Apple device. The tools required (OpenVPN, etc.) can only be installed on a jailbroken device. You can follow the state of using the TiVo Stream over a VPN in this thead over on TCF.
I haven’t had a chance to play with it yet, but OpenVPN has released a client in the iTunes store which means you don’t need to jailbreak. It remains to be seen if this client supports mDNS pass-thru, but if I get a chance I’ll check it out.
Hmm … at first glance it appears that this new OpenVPN client won’t work as a substitute for GuizmOVPN in my steps above because it doesn’t support the ‘dev tap’ directive for bridging.
I recently revisited this setup using the latest version of GuizmOVPN (v1.1.9, which I’ve since purchased a registration key for) and it works consistently over WiFi now, so that addresses caveat #1 in my original post.
I don’t use this method anymore now that my cable provider no longer copy-protects (with the CCI byte) my channels. I can stream everything to the TiVo app on my iPhone when I’m out of the house as long as I’m on WiFi (they still haven’t enabled cellular streaming for some reason).
I just bought a romio pro and had the brilliant idea that I would install a VPN and somehow trick TiVo so I could watch content while traveling….. And then I found this site 🙂 while I could spend all the time messing around with the above I decided hell no it’s not worth it … And then I started thinking out of the box about this.
Correct me if I’m wrong but it seems there may be a far far easier 2 step process (although more expensive) to accomplish the same thing.
My thought is 1.) why not just capture the hdmi output and stream it over the Internet using a simple box. (I am not sure if this is the best broadcasting box for thus but I just did a quick search)
2) use an old iPad or iphone and leave it plugged in at home. Someone at work was telling me there was a way to connect and remote control your phone …
So using this method I could remotely connect to my home phone or iPad and change or play content and then capture the hdmi broadcasting from the output.
Yea it’s messy but I travel a lot and this seems like an easy solution to just watch what’s on my TiVo while I’m away … That being said I can more easily go find any show and also steal it off the web with far less effort 🙂
Like I said in my last comment, now that my provider no longer copy-protects every channel I can stream content while I’m away from home with the TiVo iOS app just fine, no need for a complicated setup. This only works over wi-fi currently, but they recently enabled LTE streaming in the Android app so I’m hopeful this feature will be in the iOS app soon.