Ubuntu 9.10 netbook remix

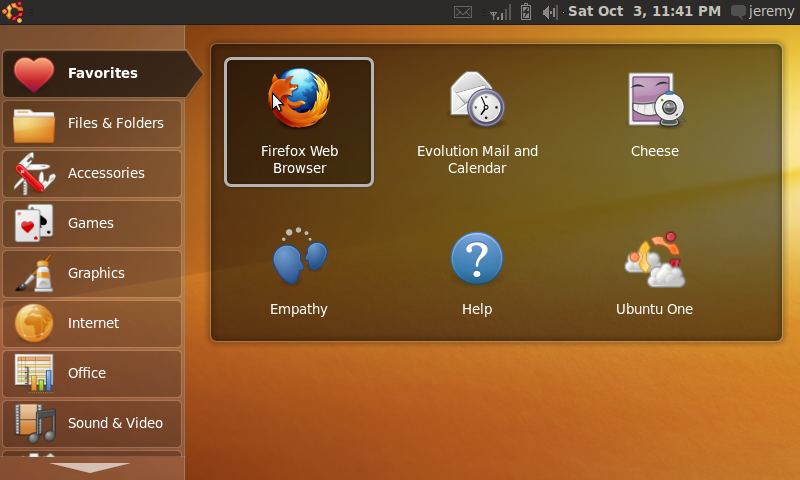
Jolicloud just wasn’t cutting it for me, so now that the beta of Ubuntu 9.10 (Karmic Koala) has been released, I’ve put it on my EeePC 4G Surf (the fourth distro I’ve run on that netbook this year). Ooooo, pretty:

Ubuntu 9.10 netbook remix

I haven’t had a lot of time to play/tweak, but so far all the important stuff (wireless, Fn keys, sound, etc.) is working.

Testing Windows 7 RTM and XP Mode

I’ve been using the release candidate of Windows 7 at home for the past few months but now we’ve started testing Windows 7 at work. This past week I “upgraded” my laptop and desktop at the office to the RTM version of Microsoft’s latest operating system. Actually, both were clean installs since they were previously running Windows XP (you can only do a true upgrade from Vista).

Installation

My main work machine is an older Sony VAIO laptop (Core Duo 2.0GHz, 1gb RAM, 80gb HD). To prepare, I ran the File and Settings Transfer (FAST) wizard in XP to back up all my documents and settings to my external hard drive, which took a long time. Then I ran the Windows 7 installation from the DVD within XP. The basic install took just about 90 minutes.

Once I was logged into my fresh new install, I ran the Windows Easy Transfer (WET) utility to restore my saved settings from XP. What I learned, however, is that I had misread the “upgrade” instructions. I was supposed to run the WET wizard from the Windows 7 installation media to back up my XP settings because the backups created by FAST are not compatible with WET (it’s meant for upgrading from XP to Vista)! Thus, after my clean install, I was unable to restore my documents and settings. I ended up working around this by restoring my FAST backup to a spare XP laptop and then using WET from the Win7 DVD to back up the settings again and finally transfer them back to my laptop.

Also, I chose not to re-format/re-partition my drive during the installation of Windows 7. The result of that was Windows 7 went into the standard C:\Windows location and the installer moved the old C:\Windows, C:\Program Files, and C:\Documents and Settings folders to C:\Windows.Old. Thus, I was able to retrieve all of my documents from there as well, in addition to retrieving some settings and files not handled by the WET utility.

If you’re “upgrading” from XP, the only benefit you get by using the WET utility is an easy (but not quick) method to transfer your documents and files (but depending on how much you’ve got to save, you may need a pretty large external drive). There aren’t that many “settings” that get transferred, from what I could tell, other than your actual account setup. You do get a nice report from the wizard, however, that shows you what applications you might need to re-install along with what was transferred. So if you’re going to format/re-partition your drive before installing Windows 7, WET is the way to go. Otherwise, I say just copy your stuff out of C:\Windows.Old after the install is complete and don’t worry about taking the extra time to back all that stuff up to an external drive (unless you want a backup just to be absolutely safe).

Drivers

After the initial install, I had basic SVGA (800×600) resolution and no Aero glass effects, as the installer did not find a suitable driver for the nVidia GeForce Go 7400 card in my laptop and the Experience Index was 1.0 due to low scores for the Graphics/Gaming Graphics items. The Windows 7 driver package (beta) from nVidia’s site did not contain a driver for the card either. I tried using the Vista driver package, but when I ran the setup program it told me a compatible adapter could not be found. Argh! I eventually was able to go into the Device Manager and manually update the driver, pointing it to the directory where the nVidia installer had extracted the Vista drivers. This gave me back the ability to use the native 1280×800 resolution on the laptop panel and also turned on all Aero Glass features once I re-ran the Experience Index (which went up to 3.5, still hampered by the low scores for graphics).

Most of the internal laptop hardware seemed to be functional, like the built-in wired and wireless network adapters, but I still had a few “Unknown Device” items listed in Device Manager. One turned out to be the built-in webcam and the other was the Memory Stick slot. The Windows 7 driver wizard was able to point me to the proper drivers directly on Sony’s web site to get these working, which was nice. My first run of Windows Update also pulled down a driver for the biometric device (fingerprint scanner).

Not every driver worked properly, though. Since the Sony Notebook Utilities wouldn’t install, I can’t use the Fn keys to control screen brightness, volume, LCD/VGA output switching, etc. I’m also missing the switcher utility that allows me to independently turn off the wireless G and Bluetooth radios. Sony’s Windows 7 page for the VAIO just says to check back once Windows 7 is officially released, so I’m hopeful this annoyance will eventually be resolved.

Post-Installation Configuration

I had made a list of everything installed on my laptop before I started this process, but it still took a lot of time to re-install everything and tweak it all back to just the way I liked it (Start Menu configuration, shortcut keys, shared drives, network printers, etc.). While annoying, this gave me the chance to leave out all of the stuff I hadn’t used in a while. Once I was done, I removed the C:\Windows.Old folder to free up the disk space.

XP Mode

I wanted to try XP Mode in Windows 7 to see if I could use it to run some of the older programs we use in the office in a virtual machine. I downloaded and installed it from Microsoft’s site, but ran into a problem when I tried to run it on my VAIO due to a lack of hardware virtualization. Apparently Sony hasn’t enabled hardware virtualization in the BIOS of any currently shipping VAIO even though the processors support it, so Virtual PC will not run.

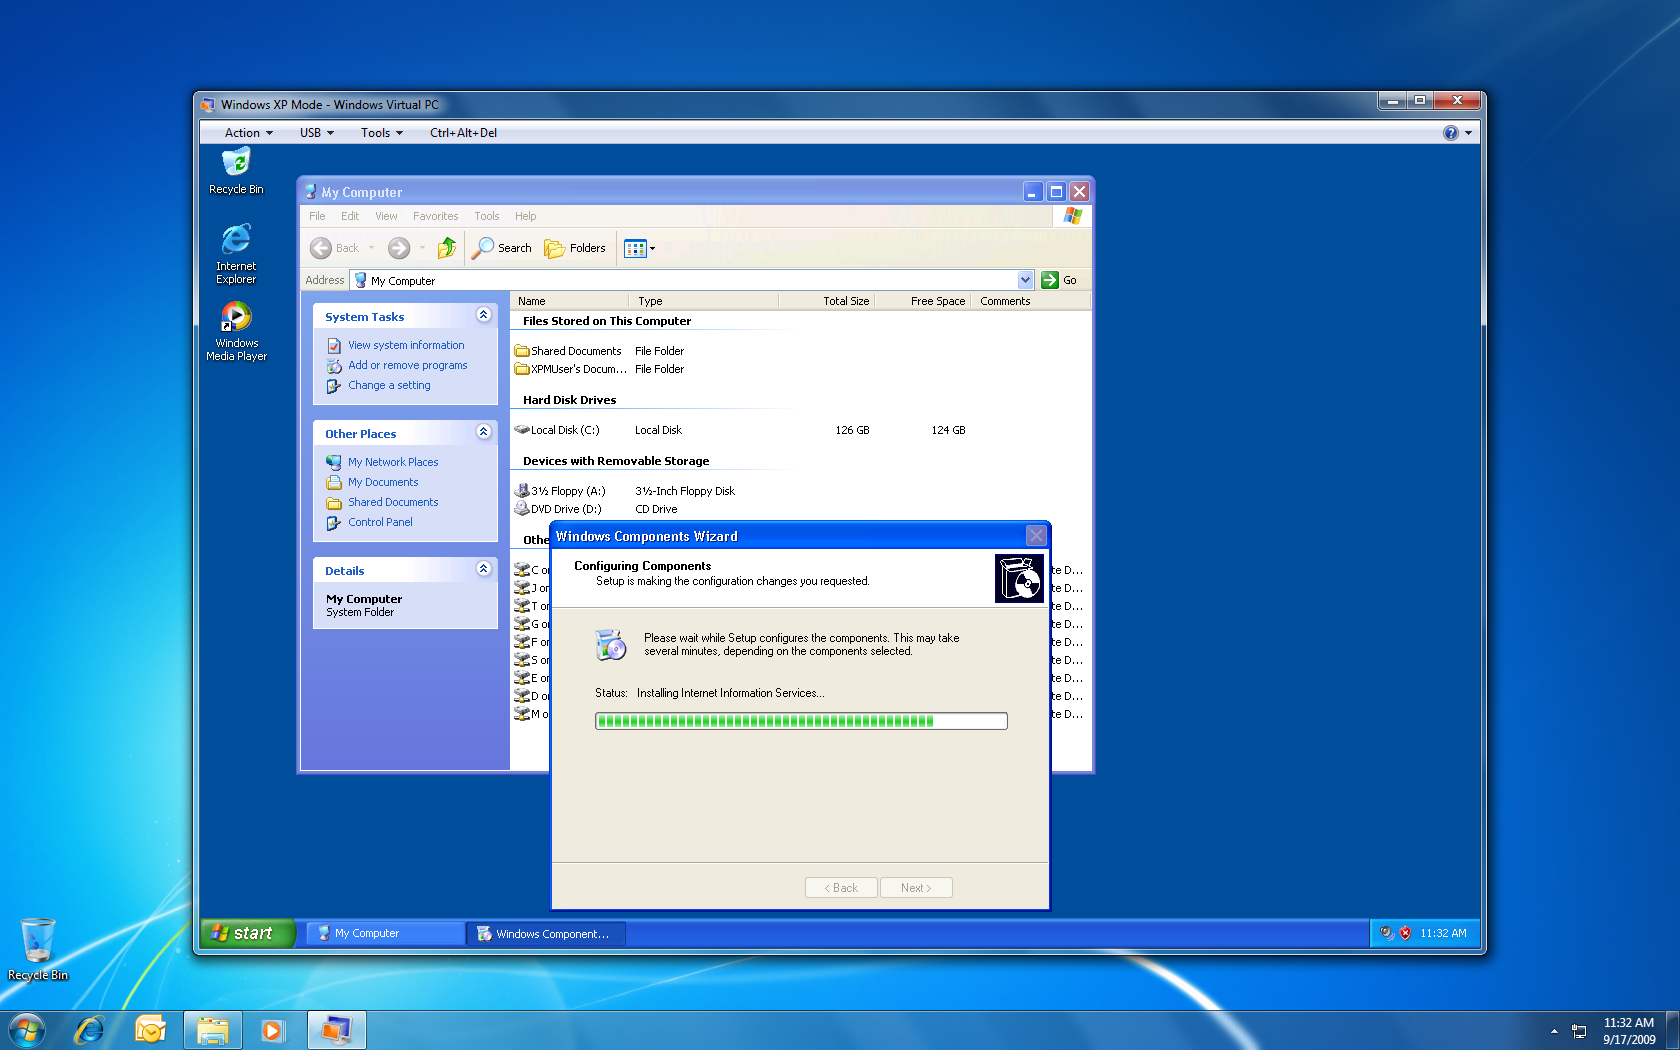
Luckily, I was able to enable hardware virtualization on my desktop (on which I had also done a clean Windows 7 install). Once you have the XP virtual machine running under Windows 7, you install your “legacy” applications normally (inside the virtual machine). For example, in the screenshot below I was adding IIS:

XP Mode in Windows 7

Windows 7 creates corresponding shortcuts for the applications under the XP Mode folder on the Start Menu of your PC (you can also add your own custom shortcuts to that folder by simply creating them under the All Users Start Menu within the virtual machine). When clicking on one of those icons, the application runs seamlessly on the desktop so the user is not even aware the application is being virtualized (except for the old XP Luna-style interface instead of the new Aero glass look). Using XP Mode, for example, I was able to successfully install NetMeeting (which I need to connect to the voicemail system console). It ran just fine “on” Windows 7, with almost no noticeable impact on performance.

It requires a little bit of advance setup but XP Mode seems to be a good way of running any legacy applications that won’t work natively under Windows 7 (assuming the user’s PC supports hardware virtualization, of course).

Garmin nüvi 265WT

Garmin nuvi 265WTA couple of weeks ago, I discovered that my trusty Garmin StreetPilot c340 wouldn’t run on battery power anymore. As soon as it was disconnected from the power cable in the car (or from the USB cable when connected to my PC) it would just turn off. When plugged in, the screen would show it was “charging,” but after trying multiple hard resets and even opening a ticket with Garmin it became apparent the internal Li-on battery was dead. The Garmin rep told me it would cost a flat $89 to fix it! I did a little research and determined that it would be cheaper to attempt to replace the battery myself, as long as I didn’t mind purchasing a replacement battery, cracking open the case, and doing a little soldering. Other than the lack of battery power and some minor map problems the unit was working perfectly fine so I wavered back and forth (repair or replace?) for a bit. Eventually I decided to just sell the StreetPilot on eBay and put the proceeds towards a newer unit.

My new GPS is the Garmin nüvi 265WT which has a 4.3″ widescreen touch display, voice directions (with text-to-speech), Bluetooth, a built-in FM Traffic receiver, and a few other cool features.

Navigation and General Usage

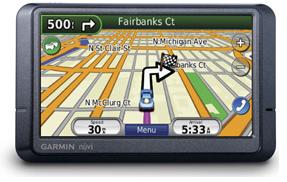
The thing I liked the best about my StreetPilot was the user interface. It was simple, clean, and good looking. The nüvi sports that same simplicity and shiny UI that makes it easy and fun to use:

The large buttons make it easy to navigate using your finger and the touchscreen, and the widescreen format allows the nüvi to show more information on the screen without it getting in the way of actually seeing the map as your driving. One new feature I like is the indicator of the current road’s speed limit (although as you can see above I was going slightly over that on my way home from work this evening ;-)). Another benefit of the widescreen model is a QWERTY keyboard layout instead of the alphabetical one used on the StreetPilot, which makes text entry a lot faster.

The standard text-to-speech voices are present so the unit will read out street names when giving directions. You can also download other voices (and car icons) from the Garmin Garage. There’s not as wide a variety of voices available as there are for my sister’s TomTom unit though (even NavTones only has a total of 3 voices compatible with Garmin units).

In addition to the normal method of entering destinations (by address, by name, by coordinates, etc.) you can upload geotagged photos to the nüvi and have it calculate the directions to that location. I don’t see myself using this feature very often unless I’m just looking for some random place to go. I may, however, introduce my daughter to geocaching, as using the Garmin Communicator plugin for my browser in conjunction with the Geocaching.com website makes it really easy to send cache locations to the GPS (and there are apparently quite a few caches near my house).

Bluetooth

The built-in Bluetooth radio lets you use  your mobile phone with the nüvi for hands-free calling. I had no issues pairing my Treo with the GPS and then using the touchscreen to place a call.

You can answer incoming calls too, of course, and even “transfer” the call to your phone if you don’t want to use the speakerphone. Voice quality was pretty good on both ends. The nüvi even downloads your call log and address book from your phone allowing you to browse and dial from the device instead of looking at your phone (although the address book part didn’t work for me since I don’t use the Treo’s native contacts application). If your phone supports voice dialing, you can do that through the nüvi as well. Another neat feature of pairing your phone is that every phone number on the display turns into a hyperlink you can use to place a call. So if you’re stuck in traffic on your way to your dinner reservation, you can simply tap your destination’s phone number on the screen to call and inform them you’re going to be slightly late.

Traffic

Of course, you should have been able to avoid that traffic in the first place! 🙂 My StreetPilot supported traffic information, but you had to purchase a separate receiver and pay for a subscription. The nüvi comes with an integrated FM Traffic Message Channel receiver and a free lifetime subscription to the service (but there’s a catch, see the next section below!). My minor nitpick here is that the receiver is not “integrated” into the GPS unit itself but is part of the power cord. Thus, you can’t get traffic information unless your unit is plugged in with the car lighter adapter. I guess this makes some sense (you don’t need traffic information if you’re hiking or riding a bike), but I was disappointed that I have to have that bulky cable plugged in as I usually just have the GPS mounted to the windshield without the cord.

That aside, the service is a neat add-on. The traffic indicator on the map screen (see the upper left-hand corner of my first screenshot) will change color (green, yellow, red) to indicate the level of traffic ahead. If the nüvi detects heavy traffic along your way, it may automatically adjust your route around it. You can also get an overview of all of the traffic in your area:

And then see where it is in relation to your current location:

Advertising!

The nüvi 265WT comes with a free lifetime subscription to the FM traffic service, but “free” in this case means “ad-supported.” That’s right, spam on your GPS! 🙁

Tapping on the “offer” will show you a list of nearby locations associated with the coupon. Tap on the location and you’ll be routed there. It wouldn’t be so bad if these only appeared on the traffic screen shown above, but these little pop-ups will also appear on the main map screen while your navigating! Ugh! The only way to disable them is to disable the traffic receiver, so if you want traffic information you’re going to have to deal with the ads. So far I’ve only seen these two Best Western ones, so it’s possible I might change how I feel about this depending on what kind of ads I see. It’s not like these are targeted to my preferences, though, so I’m guessing they’re going to be more annoying than useful.

Other Misc. Features

ecoRoute is Garmin’s new addition to their software  aimed at increasing awareness of how driving habits affect things like your gas mileage. You can set up your vehicle profile (city/highway estimated mileage, gas type, and local cost-per-gallon) and then get detailed usage reports, like this:

This trip information is also stored in a CSV file you can download from the device and then load into your favorite spreadsheet to do some more analysis if you want. ecoRoute also adds a “Less Fuel” option to the traditional “Fastest Time” or “Shortest Distance” routing options. There’s even an ecoChallenge game that tracks your driving during a trip (how fast you accelerate, brake, keep a constant speed, etc.) and then rates and scores you at the end with the hope that you’ll try to beat your top score by changing the way you drive. That part reminds me of my wife’s Toyota Camry hybrid which has similar driver feedback mechanism to encourage eco-friendly driving habits.

I also like the nüvi’s built in screenshot feature (which I used to capture all of the images in this post), and the ability to easily change the boot screen. No more using xImage!

Finally, when connected to your PC via USB, the nüvi shows up as a 1.8gb flash drive making it extremely easy to transfer files to and from the device. 1.2gb of that is taken up by the system software and maps, but that leaves roughly 518mb on-board for custom vehicle icons, voices, POI files, photos, etc. The nüvi has an SD slot as well, but with all of that free space I probably won’t need to use it as much as I did with my StreetPilot.

We’re going on a quick weekend trip up to Atlanta this weekend (to see Good Eats Live!) so I’m sure I’ll have some more comments after I put the nüvi through its paces on a real road trip. So far, though, I’m really impressed with it.
Jolicloud on my EeePC

Jolicloud transforms your netbook into a sophisticated web device that taps into the cloud to expand your computing possibilities. The web already hosts a significant part of our lives: mails, photos, videos, and friends are already somewhere online. Jolicloud was built to make the computer and web part of the same experience.

I’ve been playing around with Jolicloud, which touts itself as an “internet operating system,” on my EeePC 4G Surf for the past few days. Here’s a brief review.

Installing Jolicloud on your netbook is pretty straightforward: you download the ISO image and then use their USB Creator tool to “burn” that image onto the install media of your choice (ex., a USB thumb drive or SD card). I did have some issues with the USB Creator not recognizing my 1gb thumb drive (running under Windows 7) so I ended up using unetbootin instead (it looks like a newer version of the USB Creator has since been released which might address that problem, plus there are the older manual instructions). Next, you boot your netbook from that thumb drive, click through a few setup screens, and before you know it you’re logging into your fresh new Linux distro. There’s a good overview of the installation process (including screenshots) here.

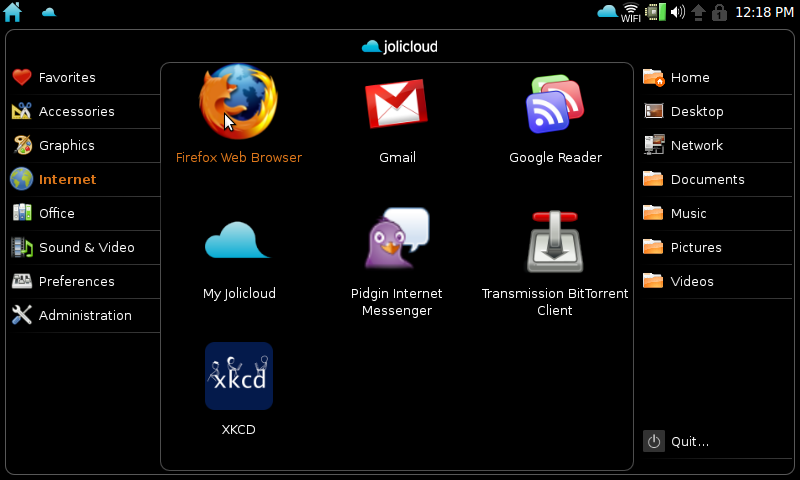
Jolicloud is based on Ubuntu 9.04 and uses the default Netbook Remix interface:

the netbook remix desktop

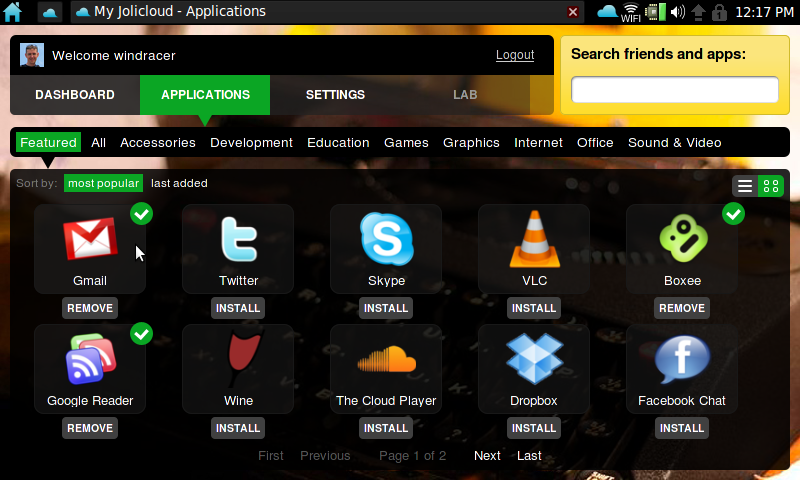
Fire up the Jolicloud application, however, and the “internet operating system” portion kicks in:

Jolicloud desktop

From here you can easily install other applications, most of which are “web apps” like Gmail, Google Reader, Twitter, Facebook, etc. What’s a little strange to me is that when you “install” one of these apps (like Gmail), you get an icon back on the netbook remix desktop to launch it (notice the xkcd icon on my first screenshot above). All it’s really doing is opening a web browser directly to that particular site, but Jolicloud (via Mozilla’s Prism) makes it look like an actual app instead of a web page. Thus, you won’t see the normal Firefox menu or toolbars, no browser favorites, etc. I’d rather just use Firefox directly with multiple tabs open, but I can see how this approach might make a netbook more user-friendly for the non-techie type (not to mention freeing up some valuable screen real estate on smaller netbooks).

I even managed to get Hulu running, which was impressive considering the problems I’ve had with Flash-based video on my Eee in the past. To be honest, though, I had never tried the Hulu site on my Eee before. At any rate, I watched the pilot episode of “Alf” on my tiny 7″ screen without any problems. Not exactly a 10-foot interface. 😉

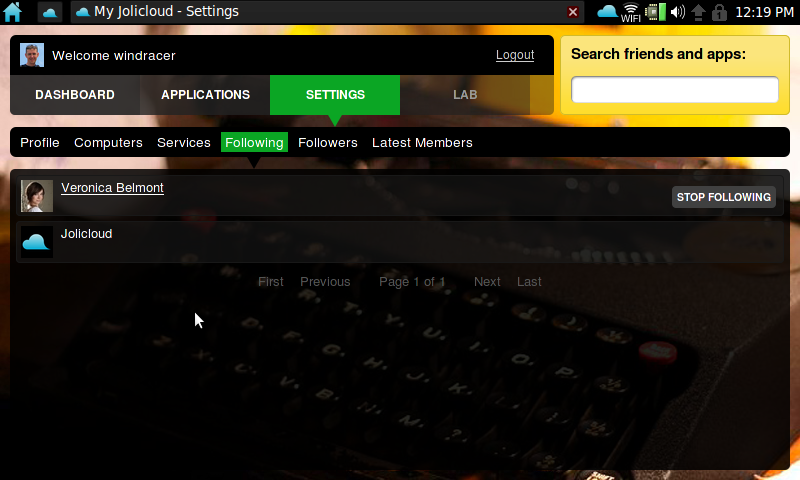
Jolicloud has a big focus on social networking, so you can “follow” other Jolicloud users and see updates on what they’ve installed or are doing with OS:

following other Jolicloud users

Personally, I’m not into the whole social networking culture (i.e., I don’t have a Facebook page and don’t use Twitter) so this part of Jolicloud’s interface doesn’t really appeal to me. I don’t want people “following” me or seeing what apps I’ve installed, but I can’t find any privacy settings that allow me to turn that stuff off, either.

Which brings me to documentation: Jolicloud is still in private alpha testing but there seems to be a lack of any documentation, and there’s no depth to the wiki (which seems to only be one page). For support you’re just directed to Twitter, Facebook, IRC, or their GetSatisfaction page. That being said, when I sent an e-mail to [email protected] about my trouble with the USB Creator, I did get an actual response relatively quickly.

So it still has a little ways to go, but Jolicloud is shaping up to be a great alternative cloud operating system for your netbook.

Cookin’ up some Wii homebrew

I saw this post on Lifehacker yesterday about installing homebrew on the Wii without needing to use the Twilight Princess hack and decided, what the heck, let’s give it a try!

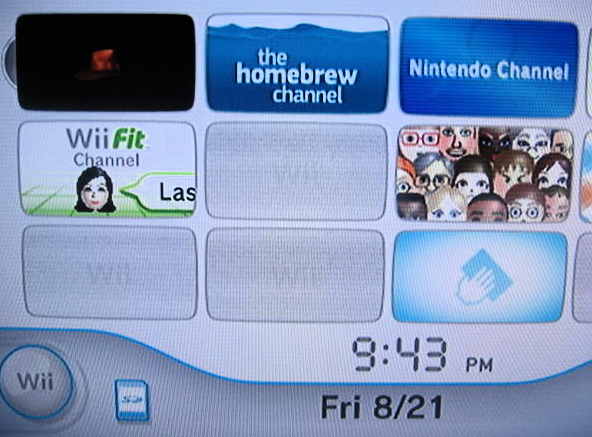
Wow, talk about amazingly simple. Only minutes after downloading the necessary files, I had the Homebrew Channel running on my Wii.

Homebrew Channel

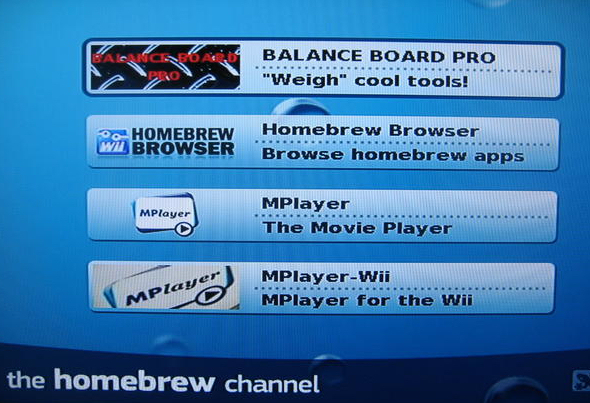
After doing a little more browsing and downloading, I had a few homebrew apps to play with.

homebrew apps

Pretty slick. Using MPlayer I was able to play both a commercial and self-created DVD using the Wii remote for the basic controls. I’ll be honest, DVD playback on the Wii isn’t going to replace a standalone DVD player yet, but for a homebrew app, it’s pretty cool. Nintendo really should just build that functionality in! With MPlayer-Wii I was able to stream an .AVI video off of my NAS (via samba) for playback through the Wii. I hard to hardcode the filename in the configuration file, so this isn’t a complete video library solution (like what I do with my TiVos) but the possibility is there.

I played around with a few homebrew games like Duck Hunt, and plan to check out Quake and Doom. For now, as you can see from the screenshot above I’ve kept the Homebrew Browser (which allows you to install apps right from the Homebrew Channel instead of having to use your PC to download and then copy them to the SD card) and Balance Board Pro which shows off some of the features of the Wii Balance Board.

Cool stuff!

Getting the most out of your TiVo

A TiVo is much more than just a souped up digital VCR. What separates TiVo from your cable company’s generic DVR (other than the awesome features of TiVo service itself) is the wide range of (mostly free) applications you can use to enhance your TiVo experience. I’ve written about some of these applications here before (like Galleon, streambaby, and pyTivo) but I figured one comprehensive write-up might be in order.

Read more

Do I still want (or need) a FitBit?

Back in September, when I was in the middle of my weight-loss regiment, I pre-ordered a FitBit. At that time, the little gadget was supposed to be shipping in January. Well, it’s now August and it looks like I might actually finally have my FitBit this month (they hope to start shipping on August 10).

But the question is: do I still need, or even want, it?

When I pre-ordered it almost a year ago I had lost about 20 pounds (via Wii Fit and my new eating habits) and was still trying to lose more. By January of this year I had lost another 20 pounds and have been keeping my weight steady at around 160lbs for the past 8 months.

My gadget addiction is still telling me I want it just for the coolness factor (a little wearable wireless device that tracks my steps and sleeping habits), but the my reasonable side is saying I don’t need this kind of information anymore. Given that a gadget (Wii Fit) kick-started my weight loss in the first place, I’m leaning towards giving the FitBit a fair shake. I could always sell it if I don’t think it’s doing anything for me … stay tuned.

15 geek movies to see before you die

Listening to TWiT episode #204 the other day I heard (at about 40:47 in) Dwight Silverman mention he had written a blog post some time ago about about 15 geek movies to see before you die that keeps resurfacing on Digg. He did say that he took a lot of flack for not including “Blade Runner” (and others) on the list. As with any “top xx” list, there will always be people who can’t believe you didn’t include this thing or that thing. Check out the comments on his post for other good movies he “missed.”

Anyway, on Dwight’s list there are only three recommendations I haven’t seen: “Brazil,” (which surprisingly I hadn’t heard of even though I’m a big Terry Gilliam fan),  “Dark City,” and “Repo Man” (Emilio Estevez … really?). I’ve added these to my personal “watch” list so I’ll get to them at some point and decide for myself if they belong on that list with the other twelve.

CompuServe, over and out

I read via Ars Technica (and then heard in episode #1012 of Buzz Out Loud) that yesterday AOL shut down CompuServe.

A little piece of Internet history has now been laid to rest, as CompuServe was shut down for good just before this Fourth of July weekend. After some 30 years of service, CompuServe’s new owner has finally pulled the plug, leaving us to reminisce about the days when the Internet was young and we were still using modems whose speed was measured in baud.

Back in the mid-to-late 80s, if you got tired of calling local BBSes with your 2400 baud modem, or you were a traveling businessman of some sort who needed something called electronic mail, you might have subscribed to one of the big three online services: CompuServe, Prodigy, or GEnie.

I have fond memories of CompuServe, particularly the CB Simulator, a precursor to IRC. It was basically a series of big chat rooms (called bands) where you could talk to other CompuServe subscribers from around the country.

During the summers of the late 80s I was a member of the All-Ohio State Fair Band and lived on the Ohio state fairgrounds for three weeks in August with the other band members. When we weren’t performing or rehearsing, I would roam about the fairgrounds with friends enjoying what the fair had to offer. In the ODOT Building at that time there were technology and science exhibits from COSI, the Columbus-area science museum. They had lasers, a text-to-speech computer (we had all sorts of fun typing phrases into that thing, or having it sing “Beautiful Ohio“), and other interactive exhibits (mostly computer-driven). One of them was a Commodore 64 computer that was connected to CompuServe! Once we discovered the CB Simulator, we were hooked. We would spend hours there, chatting away in air conditioned comfort, monopolizing the exhibit. Once the word got out, it was harder and harder to find a time when someone from the band or choir wasn’t using the exhibit for the CB Simulator (or a few text-based interactive games) … it turned into a sort of fierce competition to see who could get over there the fastest when free time was available.

CompuServe provided a welcome link to the broader outside world, beyond the microcosm of the fairgrounds, for those three weeks when we didn’t have access to television, didn’t have money to call home on the payphone, and didn’t want to buy a newspaper. I was saddened when one year the COSI exhibits were no longer present … I guess we probably ran up too big a bill. 🙂

Fare thee well, CompuServe.