 Hey, just so you know ... this post is now about 1 year and 11 months old. Please keep that in mind as it very well may contain broken links and/or outdated information.
Hanging out in the RAV4 Prime forums over on RAV4World is dangerous: people are always posting the cool accessories and customizations they’ve made to their vehicles. Based on some threads there (and in the Facebook group), I decided to try installing a dash cam!
The recommended model was the Fitcamx Dash Cam but according to their web site (and the item page on Amazon) the current model wasn’t compatible with the 2022 RAV4. The photo they had showing the incompatible camera housing didn’t match mine though (it had vents, mine has no vents) so I sent them some photos asking if it would indeed work. They said it would, so I ordered one.
Installation was pretty easy. Oddly, there are no written instructions, just a YouTube video, and if you watch it, it’s missing a major piece (how to slide off the main housing) right off the bat! Anyway, I just had to slide off the current plastic camera housing (behind the rearview mirror), transfer some plastic clips from the old housing to the one from the kit, unplug the power cable from the car’s camera and plug it into a new wiring harness, plug the new dash cam into that same harness, then snap the whole assembly back together. It took me about 20 minutes and most of that was me just being slow and cautious to make sure I didn’t break some small plastic piece, and then getting all the wiring stuffed back inside the new assembly. The end result, though, is a dash cam that looks factory installed and uses the inline power that was already going to the RAV4’s front-facing camera so everything is seamless. The kit came with a new plastic cover plate as well but I ended up re-using the small plastic OEM cover plate since it had a smaller opening than the included one (and it fit just fine).
Setup was a little problematic. Like with most devices, the dash cam broadcasts its own wireless network that you connect your phone to. I had a bit of a WiFi fight initially since my phone kept connecting to wireless CarPlay and disconnecting from the camera. Once I managed to prevent my phone from reconnecting to CarPlay, I was able to connect to the camera and get everything set up. From the mobile app you can view a live display of the camera, view recordings and snapshots, and change the settings. I made some minor changes like the wireless network name and password, then increased the resolution to the max 3840×2160 (4K). Once I had everything configured and tweaked, I “forgot” the network on my phone to prevent WiFi conflicts.
-
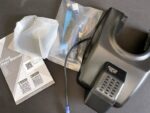
- unboxing

-
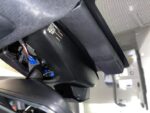
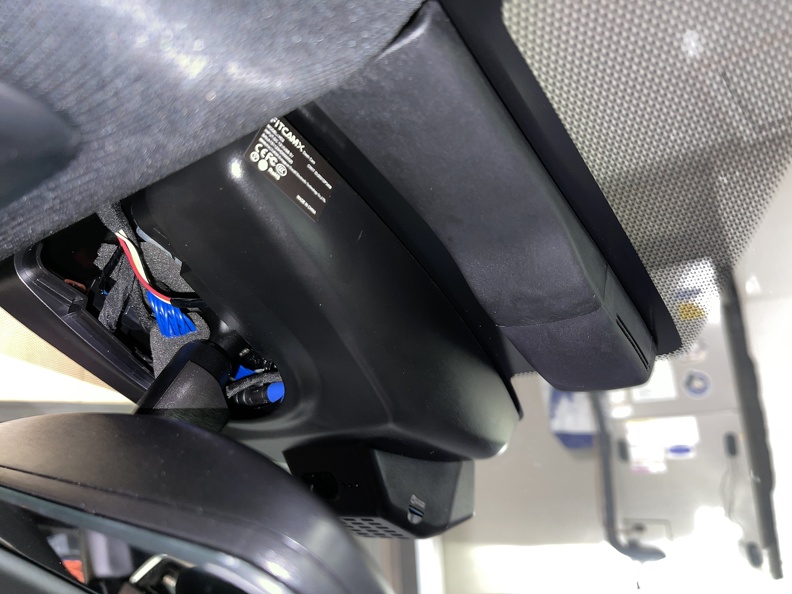
- installation (wiring)
-

- before and after
-
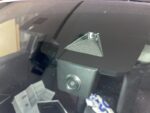
- installed

-

- mobile app
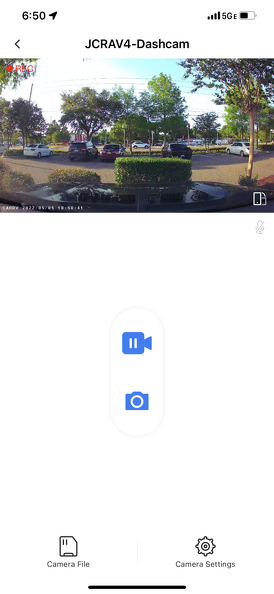
The dash cam turns on and off with the car, but a physical power button also allows you to turn it on and off if you want (otherwise, it’s always recording). There’s also a “camera” button that will take a still photo. A slot on the side houses the included 64mb microSD card (but based on recommendations from the forum threads, I replaced it with a 128gb one from Lexar). At max resolution, a 3-minute clip takes up about 530mb so that larger card should give me about 12 hours of footage (at 2560×1440, the 3-minute file size was 332mb). You can set the clips to be longer and also have the old ones be automatically overwritten when the card is full. The dash cam also has a “G-force” sensor meant to detect collisions. This will “lock” the current video recording to prevent it from being overwritten. I also discovered there’s no file size difference with audio or off. There’s always a 63kbps mono track being recorded so apparently the settings to turn off audio just mute the microphone. I don’t need to hear in-car conversations or my singing along to the radio, so I’ve left the audio off for now.
You can review and download photos and videos using the mobile app (if you connect your phone to the dash cam’s wireless network). I imagine it would take a while to download the video clips, over WiFi so I find it easier to just pop out the microSD card, plug it into my computer, and grab them that way. You’ll find a Movies, Photos, and RO folder, which I learned is “read-only” and contains any of the locked videos from the G-force sensor. I noticed that any time I pressed the camera button to take a photo, the corresponding video was moved to the RO folder. Not sure if that’s a feature (i.e., a way of saying you want to save the current clip when you take a still photo) or if my pressing of the button is triggering the G-force sensor (I lowered the sensitivity because in my initial driving tests rough roads were enough to trigger the video to be locked).
There’s a definite lack of detailed, understandable documentation. The high-level points are there, but for questions like the one above with the RO folder and camera button, I guess the only thing to do is contact Fitcamx via one of their social media accounts or e-mail. That being said, they were pretty responsive to my initial inquiry about the compatibility with my RAV4. It’s also clear the company is not US-based and the manuals and app are not written in English originally. There are a lot of misspellings and odd turns of phrase like “delete successed” or “I See” instead of “OK”. But the quality of the product, price, final installation, and footage itself is worth it. Here’s a sample video I took showing day and night drives:
I wish the lens were slightly closer to the windshield which would avoid the reflections of my dashboard at the bottom of the frame, but other than that I am really impressed with the video quality. Now to see what interesting things I can capture on video. 😉
Hey not sure if you’ll see this but I had the same issue with my 2023 RAV4 Hybrid with the competing wifi network and my wireless android auto. I see that you say after getting it setup you said “Once I had everything configured and tweaked, I “forgot” the network on my phone to prevent WiFi conflicts.”
Are you saying you forgot the network for the dashcam after you got it setup? I’m really interested in how you resolved this as I couldn’t figure it out and ended up retuning the Fitcamx to Amazon but may want to try it again.
Yes, that’s exactly what I did … removed the network connection (“forgot” it) on my iPhone. There should be a similar setting in Android.
The only issue with this is that if/when you want to connect to the camera with the app (to see the live feed, download clips/photos, etc.) you’ll have to re-enter the wireless network password, and then “forget” the connection again when you’re done. But that’s a small inconvenience compared to having to play wireless network roulette all the time to connect to wireless CarPlay/Android Auto.
I hardly ever use the app to connect to the camera so this isn’t a big deal for me. I typically pop the micro SD card out of the camera and use my laptop to review clips.
Excellent. Thanks for replying and confirming what you did to get it to work. Much appreciated!
No worries, hope it works for you! The FITCAMX is a great device.
I’ve discovered that the FITCAMX has an internal battery: it’s a small button cell used for the internal clock. I know this because last week my FITCAMX stopped stamping my videos with the correct date and time, they were all just sequential (like the clock was stopping when the car turned off, then resumed when the car powered back on).
Working with FITCAMX support, I found out that when I connected to the camera with the app on my iPhone, the date/time would be updated correctly. But then the next time I stopped and started the car, the camera would use the last date/time it had when it was turned off. Support told me that the internal battery must be dead and sent me this terrible YouTube video on how to replace it, which requires unsoldering it from the board! No other details like how to safely crack open the camera housing, what kind of battery to use, etc. etc. I know my dashcam is out of warranty but it’s just under 2 years old and this battery should not have died that quickly (or it should be user-replaceable without requiring soldering).
I heard back from support that “the previous design was not good and the battery was not easy to replace. Later we used additional wire to connect the battery without soldering it.” They’ve offered me a new camera for $45 so I might take advantage of that but it’s not exactly clear if the “new design” still requires needing to crack open the housing to get to the battery, or if it’s just not soldered in.
I received my replacement camera (from China) yesterday and got it installed today. Everything seems to be working fine. The real only difference I noticed in the “new” model is that the cord to connect it to the Y-cable behind the mirror was shorter, and I can see the antenna wire (presumably for the WiFi) comes out of the housing and is taped to the inside of the plastic shell. Looks the same otherwise. Here’s the old one on the left and the new one on the right:
I didn’t open the new one to check on the different battery configuration but I did open the original one and confirmed the battery is soldered to the board:
It’s weird, it looks like the coin cell should just slide out but it must be one of those “special” types that is pre-soldered to the leads and then the leads are soldered to the board. Poor choice of design, although it took a lot of work to get to the battery in the first place, so it’s not exactly user-replaceable unless you have some skill.
Now to see how long the battery in the replacement camera works.